


39 skills
Fire
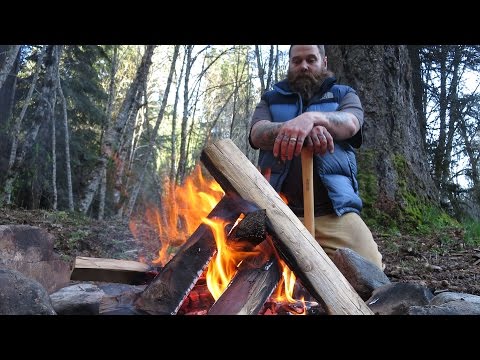
5 minLight a one-match fire
A single match is enough when the platform is built before the match comes out.
- Clear a dry patch of ground down to mineral soil or lay a bark platform.
- Prepare three graded piles: fine tinder (dry grass, birch bark, fatwood shavings), pencil-thick kindling, and thumb-thick sticks.
- Build a small teepee of the finest tinder with a pencil-lead-thin gap to insert the match.
- Strike the match toward the ground, cup it, and touch it to the lowest point of the tinder.
- Feed pencil-thick kindling on as the flame climbs; only add thumb-thick sticks once flames stand on their own.
Tip: Split a wet stick — the inside is almost always dry. Shave that inside into a pile of curls.
Trailagain — The One Match Fire

Fire
4 minCarve a feather stick
A feather stick turns one dry piece of wood into a fire's worth of tinder.
- Pick a dry, straight-grained stick the diameter of your thumb. Split it if the outside is damp.
- Brace one end on a solid surface at a shallow angle away from your body.
- Slice long, thin curls with the knife, stopping short so the shavings stay attached.
- Rotate the stick a quarter turn and repeat until the top third is a bloom of curls.
Tip: Sharper knife, thinner curls. If the shavings snap off, ease the angle and slow down.
Far North Bushcraft — Feather Stick Tips

Fire
15 minBow drill: what actually matters
Friction fire fails on details. Get these right before the arm burns out.
- Match soft, dry woods for spindle and hearth (cedar, cottonwood root, willow). Don't mix hard and soft.
- Spindle: thumb-thick, 8 inches, blunt on bottom (friction end), pointed on top (bearing end).
- Cut a pie-slice notch in the hearth board reaching to the center of the burn socket, so dust can pile up.
- Bow: shoulder-wide, slight curve, loose cord that tightens once the spindle is loaded.
- Long, full strokes; downward pressure only increases once black dust and smoke are steady.
- Tap the ember out of the notch onto bark, transfer to a tinder bundle, and blow steady from below.
Tip: If it squeals, it's polished — rough up the socket and hearth with sand.
NatureMentor — Bow Drill Fire

Water
10 minPurify water by boiling
A rolling boil kills every waterborne pathogen you'll meet in the field.
- Pre-filter through a bandana or shirt to remove silt and debris.
- Bring the water to a full rolling boil — bubbles across the whole surface, not just the sides.
- Hold the rolling boil for 1 minute (3 minutes above 6,500 ft / 2,000 m).
- Cover and cool. Pour between two containers to reoxygenate and improve taste.
Tip: No pot? Boil in a birch bark cone or a hollowed log with rocks heated in the fire.
Bushcraft Survival Australia — Filter & Boil

Water
15 minBuild a three-layer ground filter
A field filter clears silt and cuts pathogens — it doesn't replace boiling.
- Cut the bottom off a bottle (or use a bark cone) and invert it over a catch vessel.
- Bottom layer: coarse pebbles, two fingers deep.
- Middle layer: clean sand, three fingers deep.
- Top layer: crushed charcoal from your fire, three fingers deep.
- Pour cloudy water in slowly; the first pass may run dirty — recycle until clear.
- Boil the filtered output before drinking.
Warning: Charcoal only — never ash. Ash makes the water caustic.
Clay Hayes — Charcoal & Sand Filters

Shelter
30 minInsulate a sleeping platform
The ground steals more heat than the air. A bed of debris is warmer than any bag on bare dirt.
- Rake a bed area longer than you are tall and twice as wide as your shoulders.
- Lay a base of small logs or thick branches across the bed.
- Pile springy conifer boughs, dry grass, or ferns on top — four inches compressed, eight before you lie on it.
- Frame the sides with logs so debris doesn't squirt out overnight.
- Add a hot-rock heater at the foot if you have a fire going nearby.
Botanik Bushcraft — Shelter Build
Food
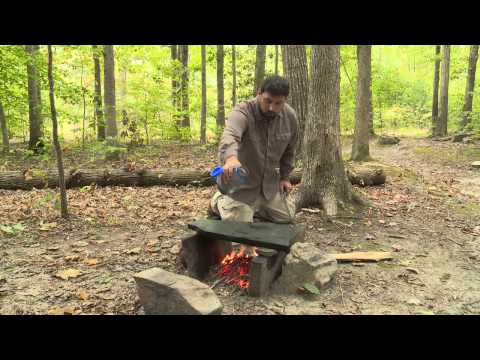
20 minCook on a hot rock
A flat, dry rock in the coals is a griddle for fish, meat, and bannock.
- Pick a flat, dry rock from well above the waterline — never from a stream or lakeshore.
- Bury it in the fire's coals for 20 minutes so it heats evenly.
- Brush off ash. Test with a drop of water — it should sizzle and skip.
- Lay fish or meat directly on the rock; flip once when the underside releases cleanly.
Warning: Wet or river rocks trap steam and can explode in a fire.
Outdoor Life — Cook Food on a Rock

Ice & Cold
5 minPrevent frostbite on hands
Once your fingers stop hurting in the cold, you have about 20 minutes.
- Layer: thin liner glove for dexterity, insulated shell for warmth. Never take both off at once.
- Keep hands moving. Fists, windmilling arms, wiggle fingers inside the glove.
- Never handle cold metal or fuel with bare skin below freezing — contact frostbite is instant.
- If fingers go numb, warm them under armpits or against a companion's stomach until sensation returns.
- Add a hat — vasoconstriction to the hands worsens fast when the head is cold.
Warning: Do not rub frozen tissue with snow or hold near a fire. Warm slowly with body heat or 100-105 °F water.
Dr. Ebraheim — Frostbite Prevention

Signaling
20 minBuild a signal fire that gets seen
The point of a signal fire is smoke and contrast, not warmth.
- Pick a spot with a wide sky view — a ridge, clearing, or lakeshore. Not under trees.
- Build three fires in a triangle 25 m apart if you have the fuel; three of anything is a distress signal.
- Keep a pile of green boughs, wet moss, or damp grass at each fire, ready to dump on.
- Against snow use dark smoke: green vegetation. Against dark forest use white smoke: damp grass, moss.
- Only light when you actually hear or see a search — smoke ignored is smoke wasted.
Bear Grylls — Perfect Signal Fire

Field Skills
45 minFind and process wild clay
Clay is everywhere along streambanks and cutbanks — you just have to test for it.
- Look at cutbanks, riverbends, and exposed subsoil below the leaf layer.
- Grab a handful, wet it, and roll a snake the thickness of a pencil.
- If it bends around your finger without cracking, it's usable clay.
- Slake: break it up in water, stir, let sit. Sand and gravel sink, clay stays suspended.
- Pour off the milky water into a cloth-lined pit; let it drain until leather-hard, then wedge (knead) to remove air.
Tip: Test-fire a small pinch pot in a hot fire. If it survives without exploding, the clay's clean enough to use.
Andy Ward — Wild Clay for Beginners

Fire
10 minStart a fire with flint and steel
A high-carbon steel and a hard rock throw sparks that only catch on truly dry, charred, or highly fibrous tinder.
- Prep a tinder nest of fine, bone-dry material and a small pinch of char cloth or true punkwood in the center.
- Hold the flint (or quartz/chert) in your off hand with a sharp edge angled up, char resting on top and pinched under your thumb.
- Strike the steel down and across the edge with a firm glancing blow — you want shaved sparks, not chips of rock.
- When a spark lands in the char and glows, transfer the char into the tinder nest and fold it closed.
- Cup the nest and blow steadily from below until it flames, then set it under a prepared kindling teepee.
Tip: If sparks skip past the char, the angle is wrong. Aim the sparks straight down onto the char rather than out into the air.
Fire
5 minHarvest and use birch bark tinder
Paper birch bark contains oils that light in rain and snow — one of the most reliable natural tinders in the northern woods.
- Take only loose, curling outer bark from live trees or strip freely from downed birch — never cut the inner bark of a healthy tree.
- Shred a small handful into thin ribbons and tease the edges until they look like feathers.
- Build a small platform of dry twigs, then set the shredded bark on top so air can flow underneath.
- Light from below with a match, spark, or ember; the oils will sustain flame for 30–60 seconds.
- Feed pencil-thick kindling the moment flames catch, and add heavier wood only when the fire stands on its own.
Warning: Girdling a live birch — cutting a full ring of bark around the trunk — will kill the tree. Take only loose outer layers.
Fire
15 minBank a fire to keep coals overnight
A properly banked fire holds live coals until morning, saving you a cold restart at dawn.
- Let the fire burn down until you have a solid bed of glowing coals — no active flame.
- Rake the coals into a compact pile in the center of the fire pit.
- Cover the coals with a 2–3 inch layer of dry ash, then a thin layer of dry soil or fine sand.
- Leave one small vent hole at the top so air can trickle in without the coals burning through the cover.
- In the morning, brush back the cover, add fine tinder to the exposed coals, and blow gently to raise a flame.
Tip: Hardwood coals bank far better than softwood. Save your best coals from oak, maple, or ash for the overnight pile.
Fire
20 minBuild a long-log fire for cold nights
Two parallel logs and a reflector turn a small fire into a heater that runs for hours with minimal tending.
- Lay two dry logs (wrist to arm-thick, 4–6 feet long) parallel on the ground about a hand-span apart.
- Fill the gap between them with a full-length bed of tinder, then kindling, then thumb-thick sticks.
- Light along the length so the whole channel catches at once; the two logs will slowly burn inward toward each other.
- Build a low reflector wall of green logs or stacked stones on the far side to bounce heat back to your shelter.
- As the top logs burn down, roll fresh logs onto the bed rather than breaking down and rebuilding the fire.
Warning: Never sleep with a fire close enough to catch bedding. A minimum of one body-length between fire and sleeping surface is a good rule.

Water
30 minPurify water with unscented household bleach
Regular 5–6% sodium hypochlorite bleach is a WHO-recognized emergency water treatment when you have no filter or fire.
- Filter cloudy water through cloth or let it settle until reasonably clear.
- Add 2 drops of unscented 5–6% household bleach per liter of clear water; use 4 drops per liter if the water is cold or still turbid.
- Stir and let stand for at least 30 minutes.
- The water should have a slight chlorine smell. If not, repeat the dose and wait another 15 minutes.
- If chlorine taste is too strong, pour between two clean containers a few times to aerate before drinking.
Warning: Never use scented, color-safe, or additive bleach. Bleach does not reliably kill Cryptosporidium — boil or filter when parasites are a concern.

Shelter
60 minBuild a lean-to shelter
A lean-to is the fastest heat-retaining shelter when you have a fire — one wall reflects, the other opens to the flame.
- Find two trees 6–8 feet apart, or set two forked uprights, and lash a strong ridgepole between them at head height.
- Lean straight poles from the ridgepole to the ground at roughly a 45° angle, spaced a hand-width apart.
- Weave finer branches horizontally through the poles to create a lattice.
- Thatch from the bottom up with overlapping bark slabs, boughs, or leafy branches — each layer overlaps the one below like shingles.
- Build your fire and reflector wall parallel to the open face, about 4–6 feet away.
Tip: Face the open side away from prevailing wind and toward your fire. Even a small breeze on the opening kills the shelter's warmth.
Shelter
45 minBuild an A-frame emergency shelter
An A-frame sheds rain from both sides and is the go-to when you have no fire — it retains body heat inside a compact space.
- Lash or wedge a ridgepole between a low tree fork and a shorter forked stick driven into the ground.
- Lean pairs of ribs against the ridgepole from both sides, angled at about 45°, spaced a hand-width apart.
- Add a horizontal lattice of finger-thick sticks over the ribs.
- Thatch heavily with leaves, boughs, or grass — at least a forearm-thick layer to shed rain and hold heat.
- Stuff the interior with dry debris to sleep on and pack extra debris against your body once inside.
Warning: Never run an open flame inside an enclosed A-frame — this is a body-heat shelter only.
Shelter
15 minRig a plow-point tarp shelter
One corner tied high, opposite two staked low — the fastest one-tarp storm shelter for a solo camper.
- Tie one corner of a square tarp to a tree or pole at chest height.
- Stake the diagonally opposite corner directly to the ground with a stout stake and taut cord.
- Stake the two remaining side corners out low on either side to form a wide triangular opening.
- Adjust tension until the tarp is drum-tight — a loose tarp flaps and collects water in bellies.
- Aim the tall opening 90° away from the wind, then build your fire in front of it if conditions allow.
Tip: If the wind shifts, loosen the high corner, rotate the whole shelter, and re-tension in under a minute — no need to rebuild.

Signaling
10 minSignal for rescue with the rule of three
Three of anything — fires, whistle blasts, gunshots, flashes — is the international distress signal recognized by rescuers.
- Build three signal fires in a triangle or straight line with 30–50 feet between them, in the largest clearing you can find.
- Prep them fully but light only when you hear or see aircraft or searchers — the goal is instant ignition, not constant burn.
- Have wet leaves, green boughs, or damp moss ready to throw on for thick smoke by day.
- By night, add dry fuel for tall, bright flames.
- If you have a whistle, use three sharp blasts, pause, repeat. Three flashes with a mirror or headlamp follow the same pattern.
Tip: Rescuers look for straight lines and geometric shapes because they don't occur in nature. A single fire may be dismissed; three in pattern is unmistakable.

Tools & Cordage
15 minBuild a hobo stove from a tin can
A large tin can with holes cut for airflow makes a fuel-efficient stove that concentrates heat under a pot.
- Take a large clean can (46 oz coffee or #10 food can), open the top completely, and clean any residue.
- Punch a ring of thumb-sized ventilation holes around the top edge with a knife tip or punch.
- Cut a fuel door in the side near the bottom — about 2 inches wide by 2 inches tall — bending the flap up and inside.
- Punch a second ring of intake holes around the bottom edge to feed air to the fire from below.
- Set on stable ground, feed pencil-thick sticks through the fuel door, and set your pot directly on top.
Tip: A hobo stove needs 90% less wood than an open fire for the same cooking task. Great for boil-only meals when fuel is scarce.
Field Skills
30 minLeave no trace of a fire
A properly disposed fire leaves the site indistinguishable from surrounding ground — good practice everywhere, not just in wilderness areas.
- Burn all wood to fine ash — no charred chunks remaining.
- Drown the ashes with water, stir, and drown again. Repeat until you can put your bare hand on the ash without any warmth.
- Scatter the cold wet ashes broadly outside the camp area — never in one heap.
- Return any rocks used for a ring to where you found them, dirty side down.
- Sweep the area with a branch to disguise scorch marks and lift compressed vegetation.
Warning: The single most common cause of wildfire is an incompletely drowned fire. If you can feel any warmth in the ashes, it's not out.
Water
15 minBoil water in a plastic bottle over coals
Water inside a plastic bottle protects the plastic from melting long enough to bring the water to a boil — a genuine emergency trick.
- Fill a clear plastic bottle (PET, like a common soda or water bottle) completely full — no air gap.
- Set the bottle upright directly on hot coals raked to the edge of the fire, not in active flame.
- Turn the bottle a quarter-turn every 30 seconds so it heats evenly.
- The water will reach a boil while the bottle scorches on the outside; contents remain drinkable.
- Handle with sticks or a bandana — the bottle is soft and hot; let it cool before pouring.
Warning: Emergency use only. Repeated heating of plastic bottles releases chemicals into the water. Use once, then discard the bottle.

Food
180 minCook in an earth oven
An earth oven bakes fish, roots, and meat with steady buried heat — no pot required and impossible to burn dinner.
- Dig a pit about twice the size of what you're cooking, and line the bottom and sides with fist-sized rocks.
- Build a hot fire in the pit and burn it hard for 60–90 minutes until the rocks are glowing.
- Rake out any large embers, lay a thick pad of green leaves or grass over the rocks, then place food (wrapped in more leaves) on the pad.
- Cover with another thick pad of green vegetation, then a layer of dirt sealing all air.
- Wait 2–4 hours — small fish and roots take about 2 hours; meat takes 3–4. Open only when ready to eat, since opening halts cooking.
Tip: Add a stick as a poker before you seal the oven. Pull it out to check without disturbing the whole cover.
Field Skills
10 minRepair broken glasses in the field
A broken pair of glasses in the backcountry becomes a safety problem fast. A few field fixes get you home.
- Broken nose bridge: wrap tightly with a strip of cloth tape or duct tape, splinted with a matchstick or twig for rigidity.
- Popped-out lens: warm the frame slightly by a fire, gently press the lens back in place, cool it, and check by lightly tapping the frame.
- Broken temple arm: splint with a stick or bent hairpin, tape or lash to remaining arm.
- Missing screw: replace temporarily with a small wire from a twist tie or a very thin sliver of wood pushed through the hinge hole.
- Cracked lens: cover the crack with clear tape on both sides to keep it holding shape until you can replace it.
Tip: Carry a spare pair of glasses (or your last prescription) in your pack for any multi-day trip. Duct tape is a fix; a spare is a solution.
Educational reference only. Wilderness conditions change fast — practice in low-stakes settings, take a certified wilderness first-aid course, and confirm regional regulations (fire, fishing, foraging, snaring) before you rely on any of these skills in the field.