Skip to content
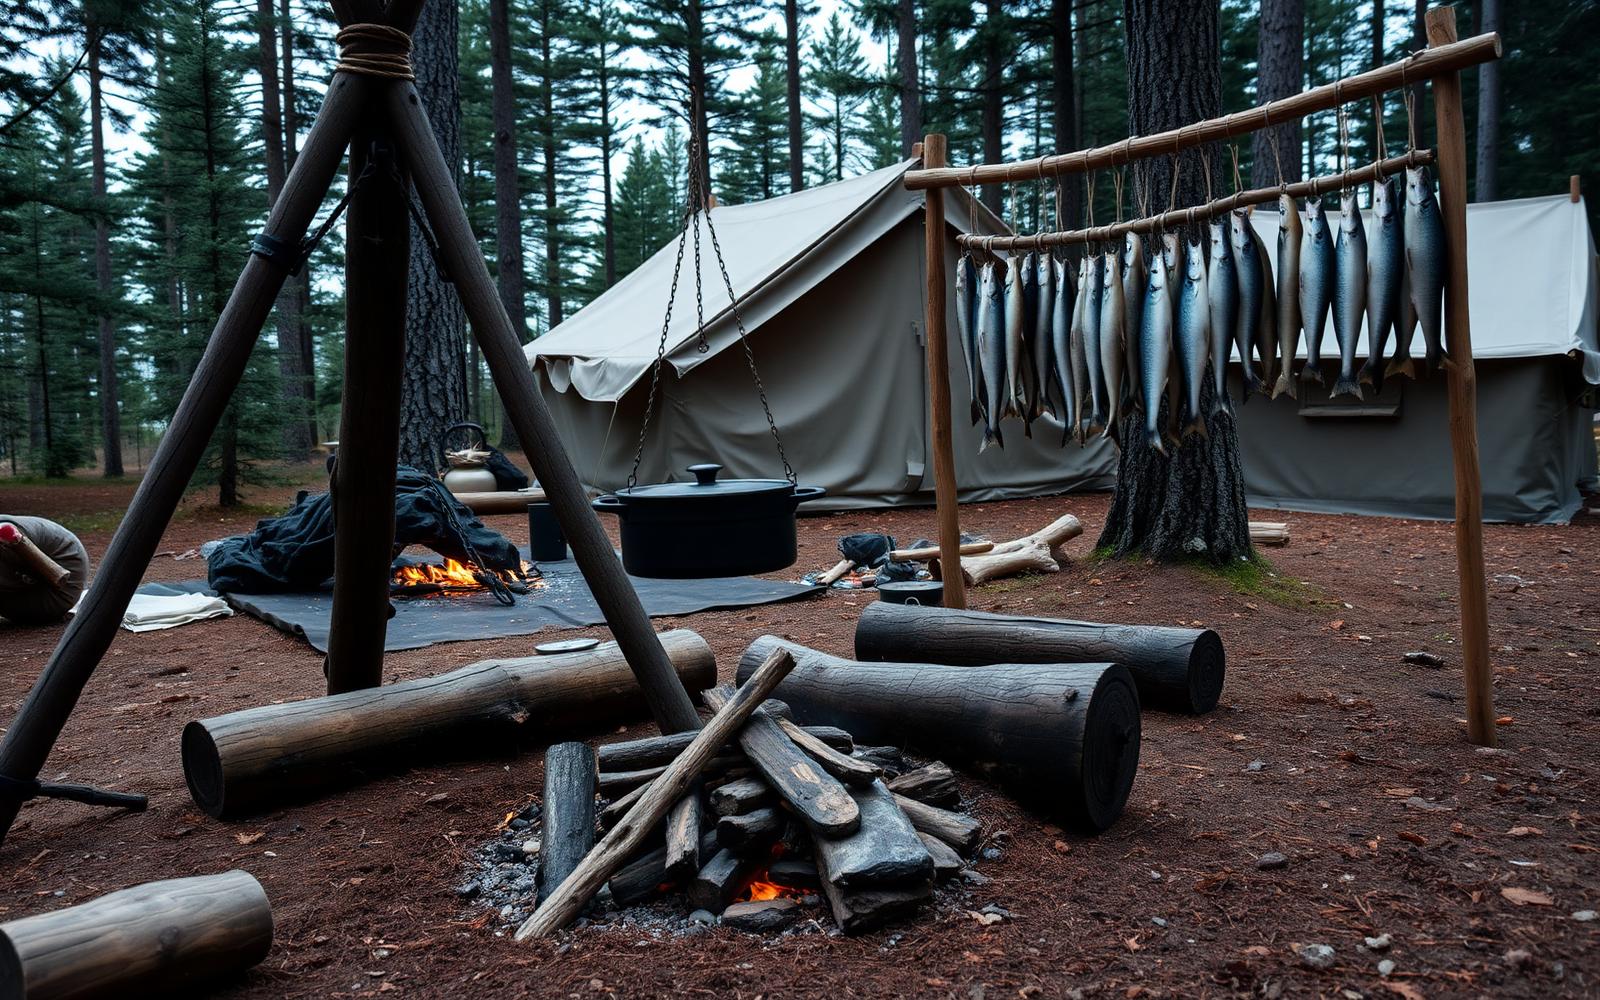
A working bushcraft camp with fire, shelter, and gear in a boreal forest

Resources

Outdoor Skills

106 bite-size wilderness tutorials — the kind of things you want in your head before you need them. Each skill is one screen: three to six steps, a tip, and any real warnings.

106 skills

  • Light a one-match fire — video thumbnail

    Fire

    5 min

    Light a one-match fire

    A single match is enough when the platform is built before the match comes out.

    1. Clear a dry patch of ground down to mineral soil or lay a bark platform.
    2. Prepare three graded piles: fine tinder (dry grass, birch bark, fatwood shavings), pencil-thick kindling, and thumb-thick sticks.
    3. Build a small teepee of the finest tinder with a pencil-lead-thin gap to insert the match.
    4. Strike the match toward the ground, cup it, and touch it to the lowest point of the tinder.
    5. Feed pencil-thick kindling on as the flame climbs; only add thumb-thick sticks once flames stand on their own.

    Tip: Split a wet stick — the inside is almost always dry. Shave that inside into a pile of curls.

    Trailagain — The One Match Fire

  • Carve a feather stick — video thumbnail

    Fire

    4 min

    Carve a feather stick

    A feather stick turns one dry piece of wood into a fire's worth of tinder.

    1. Pick a dry, straight-grained stick the diameter of your thumb. Split it if the outside is damp.
    2. Brace one end on a solid surface at a shallow angle away from your body.
    3. Slice long, thin curls with the knife, stopping short so the shavings stay attached.
    4. Rotate the stick a quarter turn and repeat until the top third is a bloom of curls.

    Tip: Sharper knife, thinner curls. If the shavings snap off, ease the angle and slow down.

    Far North Bushcraft — Feather Stick Tips

  • Make char cloth for flint and steel — video thumbnail

    Fire

    20 min

    Make char cloth for flint and steel

    Char cloth catches a spark instantly and buys you a full ember to blow into flame.

    1. Cut 100% cotton (old jeans, canvas) into 2-inch squares.
    2. Pack loosely into a small tin with a single pin-hole punched in the lid.
    3. Set the tin on coals — smoke will jet from the hole.
    4. When the smoke stops, pull the tin off and plug the hole with a twig; let it cool sealed.
    5. Cloth should be uniformly black, still flexible, and tear cleanly.

    Warning: Opening the tin while hot lets oxygen in and burns your char to ash.

    PaleoHikerMD — Making a Better Char Cloth

  • Bow drill: what actually matters — video thumbnail

    Fire

    15 min

    Bow drill: what actually matters

    Friction fire fails on details. Get these right before the arm burns out.

    1. Match soft, dry woods for spindle and hearth (cedar, cottonwood root, willow). Don't mix hard and soft.
    2. Spindle: thumb-thick, 8 inches, blunt on bottom (friction end), pointed on top (bearing end).
    3. Cut a pie-slice notch in the hearth board reaching to the center of the burn socket, so dust can pile up.
    4. Bow: shoulder-wide, slight curve, loose cord that tightens once the spindle is loaded.
    5. Long, full strokes; downward pressure only increases once black dust and smoke are steady.
    6. Tap the ember out of the notch onto bark, transfer to a tinder bundle, and blow steady from below.

    Tip: If it squeals, it's polished — rough up the socket and hearth with sand.

    NatureMentor — Bow Drill Fire

  • Find dry tinder in wet woods — video thumbnail

    Fire

    5 min

    Find dry tinder in wet woods

    Standing dead wood and inner bark stay dry through days of rain.

    1. Skip anything on the ground — it's wicking water.
    2. Look for standing dead branches still attached to trees; snap them for a dry, sharp crack.
    3. Peel birch bark from dead trees only; it lights wet.
    4. Pull inner bark from dead cedar or juniper and shred between the palms into a fluff.
    5. Look under conifer skirts for dry needles and pitch-soaked wood (fatwood) at stump bases.

    Wilderness Strong — Fire in Wet Weather

  • Find water in dry country — video thumbnail

    Water

    10 min

    Find water in dry country

    Water moves down and collects predictably — read the terrain first, then walk.

    1. Head to the lowest ground: canyon bottoms, dry washes, the outside bends of dry riverbeds.
    2. Dig at the base of cliff pour-offs and in shaded gravel bars — seep water rises in minutes.
    3. Follow converging animal trails downhill; they braid toward water.
    4. Watch for green vegetation (cottonwood, willow, cattail) standing out from the surroundings.
    5. At dawn, look for insects, especially bees — most fly within a mile of water.

    Warning: Always purify seep and puddle water; livestock and wildlife share the same holes.

    Chad Zuber — Water in the Desert

  • Purify water by boiling — video thumbnail

    Water

    10 min

    Purify water by boiling

    A rolling boil kills every waterborne pathogen you'll meet in the field.

    1. Pre-filter through a bandana or shirt to remove silt and debris.
    2. Bring the water to a full rolling boil — bubbles across the whole surface, not just the sides.
    3. Hold the rolling boil for 1 minute (3 minutes above 6,500 ft / 2,000 m).
    4. Cover and cool. Pour between two containers to reoxygenate and improve taste.

    Tip: No pot? Boil in a birch bark cone or a hollowed log with rocks heated in the fire.

    Bushcraft Survival Australia — Filter & Boil

  • Build a three-layer ground filter — video thumbnail

    Water

    15 min

    Build a three-layer ground filter

    A field filter clears silt and cuts pathogens — it doesn't replace boiling.

    1. Cut the bottom off a bottle (or use a bark cone) and invert it over a catch vessel.
    2. Bottom layer: coarse pebbles, two fingers deep.
    3. Middle layer: clean sand, three fingers deep.
    4. Top layer: crushed charcoal from your fire, three fingers deep.
    5. Pour cloudy water in slowly; the first pass may run dirty — recycle until clear.
    6. Boil the filtered output before drinking.

    Warning: Charcoal only — never ash. Ash makes the water caustic.

    Clay Hayes — Charcoal & Sand Filters

  • Collect dew with a bandana — video thumbnail

    Water

    30 min

    Collect dew with a bandana

    Dew off unpoisoned grass gives you a cup or two before sunrise.

    1. Before dawn, tie a clean bandana or shirt around your calves.
    2. Walk slowly through tall, ungrazed grass until the cloth is soaked.
    3. Wring the cloth into a container. Repeat until sun burns off the dew.
    4. Purify before drinking — dew picks up whatever's on the plants.

    Warning: Skip grass near roads, farmland, or animal droppings.

    Military.com — Collect Dew for Drinking

  • Solar still basics — video thumbnail

    Water

    30 min

    Solar still basics

    A solar still gives small amounts of clean water at a large cost of sweat.

    1. Dig a pit two feet wide and a foot deep in a sunny spot with damp soil or green vegetation.
    2. Place a container in the center; line the pit with green plants around it.
    3. Cover the pit with a clear plastic sheet and seal the edges with soil.
    4. Set a small stone on the plastic directly over the container to form a low point.
    5. Water condenses on the underside, runs to the low point, and drips into the container.

    Tip: Yield is small — a still is a supplement, not a plan. Dig it only if you're already staying put.

    Von Malegowski — Solar Still

  • Build a debris hut — video thumbnail

    Shelter

    90 min

    Build a debris hut

    A debris hut is the warmest one-person shelter you can build with no cordage.

    1. Prop a stout ridgepole (twice your height) between a low fork and the ground.
    2. Lean ribs of sticks along both sides at 45°, packed tight enough to hold leaves.
    3. Pile leaves, ferns, or grass on the outside — three feet deep everywhere.
    4. Stuff the inside with dry leaves until you have to burrow in.
    5. Plug the entrance behind you with a backpack or a bundle of debris.

    Tip: If a raccoon couldn't push through the wall, it's thick enough to hold body heat.

    Tom Brown III — Survival Shelter

  • Site a tarp for wind and rain — video thumbnail

    Shelter

    20 min

    Site a tarp for wind and rain

    Where you pitch matters more than what you pitch.

    1. Skip valley bottoms — cold air pools there overnight.
    2. Skip ridge tops — wind hammers exposed sites.
    3. Look mid-slope, back into a treeline, with the closed end into the wind.
    4. Check overhead for widow-makers: dead branches, leaning trees, loose rock.
    5. Pitch the low end downhill so water runs away, not under your bag.

    TA Outdoors — 15 Tarp Shelter Setups

  • Insulate a sleeping platform — video thumbnail

    Shelter

    30 min

    Insulate a sleeping platform

    The ground steals more heat than the air. A bed of debris is warmer than any bag on bare dirt.

    1. Rake a bed area longer than you are tall and twice as wide as your shoulders.
    2. Lay a base of small logs or thick branches across the bed.
    3. Pile springy conifer boughs, dry grass, or ferns on top — four inches compressed, eight before you lie on it.
    4. Frame the sides with logs so debris doesn't squirt out overnight.
    5. Add a hot-rock heater at the foot if you have a fire going nearby.

    Botanik Bushcraft — Shelter Build

  • Dig a one-night snow trench — video thumbnail

    Shelter

    45 min

    Dig a one-night snow trench

    A trench is faster than a quinzhee and warmer than a tarp when you have snow but no time.

    1. Find snow at least chest-deep. Test-probe with a stick for hidden rocks and roots.
    2. Dig a body-length trench slightly wider than your shoulders and knee-deep below the trench floor.
    3. Roof it with skis, poles, or sturdy branches laid across the top, then blocks of cut snow.
    4. Leave a small vent hole for CO₂ and mark it from outside with a ski or stick.
    5. Line the floor with a pad or thick bough bed before you get in.

    Warning: Never seal a snow shelter completely — suffocation is a real risk without a vent.

    Gone Feral — Snow Trench Shelter

  • Find north with a stick and shadow — video thumbnail

    Navigation

    15 min

    Find north with a stick and shadow

    A shadow moves west to east through the day — that gives you a true east-west line.

    1. Push a straight stick vertically into flat, level ground in the sun.
    2. Mark the tip of the shadow with a small stone. Wait 15-20 minutes.
    3. Mark the new tip of the shadow with a second stone.
    4. The line between the two stones runs west-to-east; first stone is west.
    5. Stand with the first stone at your left foot and the second at your right — you're facing north.

    Tip: Longer wait, more accurate line. This works anywhere the sun casts a shadow.

    AlfieAesthetics — The Primitive Compass

  • Read a topo map in one minute — video thumbnail

    Navigation

    5 min

    Read a topo map in one minute

    Contour lines tell you shape and steepness — the whole map is in the spacing.

    1. Close-spaced lines = steep. Wide-spaced = gentle.
    2. V's pointing uphill = drainage or creek. V's pointing downhill = ridgeline.
    3. Circles inside circles = a summit; hachured circles = a depression.
    4. Blue = water, green = vegetation, white = open/rock/snow, brown = elevation.
    5. Check the contour interval in the legend before guessing elevation.

    REI — How to Read a Topo Map

  • Navigate by handrails and catching features — video thumbnail

    Navigation

    10 min

    Navigate by handrails and catching features

    Two habits that keep you found without a GPS: follow a handrail, aim past a catch.

    1. Pick a linear feature parallel to your route — a river, ridge, road, or valley. That's your handrail.
    2. Walk keeping the handrail on the same side, checking it visually every few minutes.
    3. Choose a catching feature past your destination — a river, cliff, or trail perpendicular to your route.
    4. If you hit the catching feature, you've overshot — turn back along the handrail.
    5. Aim off deliberately: bias 5-10° left or right of the target so you always know which way to turn at the catch.

    Mowser — Essential Hiking Navigation

  • Measure distance with a pace count — video thumbnail

    Navigation

    10 min

    Measure distance with a pace count

    Knowing your pace count over 100 m tells you how far you've walked without a GPS.

    1. Measure or step off 100 meters on flat, open ground.
    2. Walk it at a natural pace, counting every time your left foot lands. That's your pace count.
    3. Typical adult: 60-70 paces per 100 m.
    4. In broken ground, up hills, or with a heavy pack, add 20-30% to your count.
    5. Track distance with pebbles or knots — one per 100 m walked.

    SF Actual — Basic Land Navigation

  • Set a simple wire snare — video thumbnail

    Food

    15 min

    Set a simple wire snare

    A well-placed snare beats a well-tied one. Read the trail before you set anything.

    1. Find a fresh, narrow game trail — droppings, tracks, low-brushed vegetation.
    2. Choose a natural pinch point where brush forces animals through single-file.
    3. Form a loop in snare wire the size of a fist for rabbits, larger for bigger game.
    4. Suspend the loop over the trail so the bottom sits at the animal's chin height.
    5. Anchor to a sapling or heavy branch. Brush around the loop so animals can't sidestep.

    Warning: Check local law — snaring is regulated everywhere and prohibited in many places outside survival need.

    Clay Hayes — 5 Survival Traps & Snares

  • Identify wild edibles safely — video thumbnail

    Food

    20 min

    Identify wild edibles safely

    You don't have to know every plant — you have to know a few, cold.

    1. Learn 5-10 edible species in your home region with 100% ID confidence — leaf, stem, fruit, and habitat.
    2. Learn their toxic look-alikes at the same time.
    3. Positive ID means multiple features match, not just one.
    4. Never rely on the Universal Edibility Test in the field — it's slow, error-prone, and can hurt you.
    5. When in doubt, leave it out.

    Warning: Some deadly plants (water hemlock, false hellebore, death camas) resemble common edibles. Guess = don't eat.

    Robin Greenfield — Easy Edible Plants

  • Fish with a hand line — video thumbnail

    Food

    30 min

    Fish with a hand line

    A hand line and a hook out-fish most improvised setups.

    1. Wrap 30-50 ft of line around a smooth stick or bottle to keep it tangle-free.
    2. Tie on a small hook and a stone or split-shot for weight.
    3. Bait with grubs from under bark, worms from wet soil, or minnows caught with a shirt seine.
    4. Cast underhand from cover; let the bait sink to where fish hold — undercut banks, log jams, current seams.
    5. Set the hook with a firm wrist snap the moment you feel the tap.

    Tip: Fish are more active at dawn and dusk. If nothing hits in 15 minutes, move.

    Fishing Yoyito — Simple Hand Reels
  • Cook on a hot rock — video thumbnail

    Food

    20 min

    Cook on a hot rock

    A flat, dry rock in the coals is a griddle for fish, meat, and bannock.

    1. Pick a flat, dry rock from well above the waterline — never from a stream or lakeshore.
    2. Bury it in the fire's coals for 20 minutes so it heats evenly.
    3. Brush off ash. Test with a drop of water — it should sizzle and skip.
    4. Lay fish or meat directly on the rock; flip once when the underside releases cleanly.

    Warning: Wet or river rocks trap steam and can explode in a fire.

    Outdoor Life — Cook Food on a Rock

  • Tell if ice is safe to cross — video thumbnail

    Ice & Cold

    5 min

    Tell if ice is safe to cross

    Color, thickness, and history — check all three before you step out.

    1. Clear blue or black ice is the strongest. White or opaque ice is half as strong. Grey ice is unsafe — leave it alone.
    2. Thickness rules of thumb on clear ice: 4 in / 10 cm to walk, 5-7 in / 12-18 cm for a snowmobile, 12+ in / 30+ cm for a light truck.
    3. Drill or chop test holes every 50 ft on unknown ice and measure — don't guess.
    4. Skip inlets, outlets, springs, currents, and any area with cracks radiating from a point.
    5. Avoid ice near docks and pilings; dark objects absorb heat and thin the ice around them.

    Warning: No ice is guaranteed safe. If you break through, kick horizontally, get your arms flat on solid ice, and roll — don't try to climb.

    Jason Mitchell — Ice Safety Checklist

  • Prevent frostbite on hands — video thumbnail

    Ice & Cold

    5 min

    Prevent frostbite on hands

    Once your fingers stop hurting in the cold, you have about 20 minutes.

    1. Layer: thin liner glove for dexterity, insulated shell for warmth. Never take both off at once.
    2. Keep hands moving. Fists, windmilling arms, wiggle fingers inside the glove.
    3. Never handle cold metal or fuel with bare skin below freezing — contact frostbite is instant.
    4. If fingers go numb, warm them under armpits or against a companion's stomach until sensation returns.
    5. Add a hat — vasoconstriction to the hands worsens fast when the head is cold.

    Warning: Do not rub frozen tissue with snow or hold near a fire. Warm slowly with body heat or 100-105 °F water.

    Dr. Ebraheim — Frostbite Prevention

  • Warm a hypothermic person in the field — video thumbnail

    Ice & Cold

    30 min

    Warm a hypothermic person in the field

    Get them dry, insulated, and out of the wind before you do anything else.

    1. Move them out of wind and off cold ground onto a pad, pack, or bough bed.
    2. Cut off wet clothing and dry the skin. Wet cotton pulls heat 25x faster than dry.
    3. Wrap in insulation: sleeping bag, spare clothes, tarp burrito over the top.
    4. Add heat sources at the neck, armpits, and groin — hot water bottles wrapped in a shirt work well.
    5. Give warm sugary drinks only if fully alert. No alcohol.

    Warning: A severely hypothermic person may seem drunk or drowsy. Handle gently — rough movement can trigger cardiac arrest.

    ProCPR — Cold-Related Emergencies

  • Build a signal fire that gets seen — video thumbnail

    Signaling

    20 min

    Build a signal fire that gets seen

    The point of a signal fire is smoke and contrast, not warmth.

    1. Pick a spot with a wide sky view — a ridge, clearing, or lakeshore. Not under trees.
    2. Build three fires in a triangle 25 m apart if you have the fuel; three of anything is a distress signal.
    3. Keep a pile of green boughs, wet moss, or damp grass at each fire, ready to dump on.
    4. Against snow use dark smoke: green vegetation. Against dark forest use white smoke: damp grass, moss.
    5. Only light when you actually hear or see a search — smoke ignored is smoke wasted.

    Bear Grylls — Perfect Signal Fire

  • Aim a signal mirror at an aircraft — video thumbnail

    Signaling

    5 min

    Aim a signal mirror at an aircraft

    A signal mirror is visible 20+ miles on a clear day — but only if you aim it.

    1. Hold the mirror close to your face and sight through the aiming hole (or over the top edge).
    2. Extend the other hand as a V with two fingers framing the aircraft.
    3. Tilt the mirror until the bright spot from the sunbeam lands on your fingers.
    4. Sweep across the aircraft repeatedly — a moving flash catches attention.
    5. Even without a proper mirror, use a phone screen, CD, or polished can lid the same way.

    MNWoodland — How to Use a Signal Mirror

  • Ground-to-air signals every pilot knows — video thumbnail

    Signaling

    10 min

    Ground-to-air signals every pilot knows

    Five internationally recognized symbols. Make each one 10 ft / 3 m tall in high-contrast material.

    1. V = require assistance.
    2. X = require medical assistance.
    3. N = no or negative.
    4. Y = yes or affirmative.
    5. → (arrow) = proceeding in this direction.
    6. Stomp them into snow, dig them into sand, or lay them out in dark logs on light ground.

    Tip: Size and contrast matter more than shape. From 2,000 ft, small is invisible.

    Forest & Lands — Signaling 101

  • Sharpen a knife on a river stone — video thumbnail

    Tools & Cordage

    10 min

    Sharpen a knife on a river stone

    A smooth, flat river stone is a serviceable field whetstone.

    1. Pick a stone with a flat, fine-grained face. Wet it thoroughly.
    2. Hold the knife at roughly 20°: the thickness of two stacked coins between spine and stone.
    3. Sweep the edge across the stone like you're slicing a thin layer off it.
    4. Do 10-15 strokes per side, alternating until you feel a burr along the whole edge.
    5. Finish by stropping on your belt, denim, or the inside of a leather boot.

    Tip: A knife sharp enough to shave the hair off your forearm is sharp enough.

    Outdoor Life — Sharpen a Knife with a Rock

  • Make cordage from tree bark — video thumbnail

    Tools & Cordage

    20 min

    Make cordage from tree bark

    Two-ply reverse-wrap cordage from inner bark is strong enough for a bow drill or shelter lashing.

    1. Strip long ribbons of inner bark from dead cedar, basswood, willow, or dogbane.
    2. Split the ribbons to pencil-lead thickness. Bunch them into two equal strands.
    3. Twist one strand away from you until it kinks, then bring the other strand over it.
    4. Twist the new top strand away, wrap it over — repeat, feeding in new fiber as strands thin.
    5. Splice new fiber staggered so the joints don't line up.

    Far North Bushcraft — Willow Bark Cordage

  • The four knots that matter — video thumbnail

    Tools & Cordage

    15 min

    The four knots that matter

    Skip the rest until these are automatic.

    1. Bowline — a fixed loop that never slips or jams. Rescue, anchoring, tarps.
    2. Taut-line hitch — an adjustable loop for tent guy lines. Tighten or loosen by hand.
    3. Clove hitch — quick attachment to a pole or post. Great for starting lashings.
    4. Trucker's hitch — a pulley for tensioning a line. Ridge lines, cargo, tarps in wind.

    Tip: Practice each 20 times with cold, wet hands and eyes closed. That's field-ready.

    Trailguide — Clove Hitch (start here)

  • Stop severe bleeding — video thumbnail

    First Aid

    5 min

    Stop severe bleeding

    You have minutes. Direct pressure first, tourniquet if it doesn't stop.

    1. Press hard directly on the wound with any cloth — shirt, bandana, hand. Do not lift to look.
    2. Elevate the injury above the heart if possible.
    3. Hold pressure for at least 10 uninterrupted minutes.
    4. If blood soaks through, add material on top — do not remove the first layer.
    5. If bleeding won't stop on a limb, apply a tourniquet 2-3 in above the wound, tight enough that the bleeding stops. Note the time.

    Warning: A properly applied tourniquet hurts. Once on, it stays on until a medical professional removes it.

    American College of Surgeons — Tourniquet

  • Stop a blister before it forms — video thumbnail

    First Aid

    5 min

    Stop a blister before it forms

    The moment you feel a hotspot, stop. Two more miles turns hotspot into open wound.

    1. At the first burn or rub, take the boot off. Don't wait for camp.
    2. Dry the foot and sock completely.
    3. Cover the hotspot with athletic tape, moleskin, or duct tape — the patch must extend well past the friction zone.
    4. Smooth every wrinkle in the sock before re-lacing.
    5. Recheck within the hour; adjust before it goes through.

    Tip: If the blister has already formed, don't pop it in the field. Ring it with padding and leave it intact.

    Mowser — Why You Get Blisters

  • Read the sky for coming rain — video thumbnail

    Weather

    5 min

    Read the sky for coming rain

    Clouds move faster than fronts. You have hours of warning if you look up.

    1. High, wispy cirrus followed by lowering, thickening clouds = warm front, rain in 12-24 hours.
    2. Towering cumulus building vertically in the afternoon = thunderstorms within hours.
    3. A halo around sun or moon = high moisture aloft, weather worsening in 24-36 hours.
    4. Sudden wind shift and dropping temperature = cold front, fast squall likely.
    5. Sharp, distant horizon = dry air. Hazy horizon = moist air, storms more likely.

    Tip: Red sky at night reflects dry air to the west — clearing. Red sky in morning reflects moisture arriving — deteriorating.

    NatureMentor — Cloud Types & Weather

  • Find and process wild clay — video thumbnail

    Field Skills

    45 min

    Find and process wild clay

    Clay is everywhere along streambanks and cutbanks — you just have to test for it.

    1. Look at cutbanks, riverbends, and exposed subsoil below the leaf layer.
    2. Grab a handful, wet it, and roll a snake the thickness of a pencil.
    3. If it bends around your finger without cracking, it's usable clay.
    4. Slake: break it up in water, stir, let sit. Sand and gravel sink, clay stays suspended.
    5. Pour off the milky water into a cloth-lined pit; let it drain until leather-hard, then wedge (knead) to remove air.

    Tip: Test-fire a small pinch pot in a hot fire. If it survives without exploding, the clay's clean enough to use.

    Andy Ward — Wild Clay for Beginners

  • Fire skill

    Fire

    10 min

    Start a fire with flint and steel

    A high-carbon steel and a hard rock throw sparks that only catch on truly dry, charred, or highly fibrous tinder.

    1. Prep a tinder nest of fine, bone-dry material and a small pinch of char cloth or true punkwood in the center.
    2. Hold the flint (or quartz/chert) in your off hand with a sharp edge angled up, char resting on top and pinched under your thumb.
    3. Strike the steel down and across the edge with a firm glancing blow — you want shaved sparks, not chips of rock.
    4. When a spark lands in the char and glows, transfer the char into the tinder nest and fold it closed.
    5. Cup the nest and blow steadily from below until it flames, then set it under a prepared kindling teepee.

    Tip: If sparks skip past the char, the angle is wrong. Aim the sparks straight down onto the char rather than out into the air.

  • Fire skill

    Fire

    5 min

    Harvest and use birch bark tinder

    Paper birch bark contains oils that light in rain and snow — one of the most reliable natural tinders in the northern woods.

    1. Take only loose, curling outer bark from live trees or strip freely from downed birch — never cut the inner bark of a healthy tree.
    2. Shred a small handful into thin ribbons and tease the edges until they look like feathers.
    3. Build a small platform of dry twigs, then set the shredded bark on top so air can flow underneath.
    4. Light from below with a match, spark, or ember; the oils will sustain flame for 30–60 seconds.
    5. Feed pencil-thick kindling the moment flames catch, and add heavier wood only when the fire stands on its own.

    Warning: Girdling a live birch — cutting a full ring of bark around the trunk — will kill the tree. Take only loose outer layers.

  • Fire skill

    Fire

    15 min

    Bank a fire to keep coals overnight

    A properly banked fire holds live coals until morning, saving you a cold restart at dawn.

    1. Let the fire burn down until you have a solid bed of glowing coals — no active flame.
    2. Rake the coals into a compact pile in the center of the fire pit.
    3. Cover the coals with a 2–3 inch layer of dry ash, then a thin layer of dry soil or fine sand.
    4. Leave one small vent hole at the top so air can trickle in without the coals burning through the cover.
    5. In the morning, brush back the cover, add fine tinder to the exposed coals, and blow gently to raise a flame.

    Tip: Hardwood coals bank far better than softwood. Save your best coals from oak, maple, or ash for the overnight pile.

  • Fire skill

    Fire

    20 min

    Build a long-log fire for cold nights

    Two parallel logs and a reflector turn a small fire into a heater that runs for hours with minimal tending.

    1. Lay two dry logs (wrist to arm-thick, 4–6 feet long) parallel on the ground about a hand-span apart.
    2. Fill the gap between them with a full-length bed of tinder, then kindling, then thumb-thick sticks.
    3. Light along the length so the whole channel catches at once; the two logs will slowly burn inward toward each other.
    4. Build a low reflector wall of green logs or stacked stones on the far side to bounce heat back to your shelter.
    5. As the top logs burn down, roll fresh logs onto the bed rather than breaking down and rebuilding the fire.

    Warning: Never sleep with a fire close enough to catch bedding. A minimum of one body-length between fire and sleeping surface is a good rule.

  • Water skill

    Water

    30 min

    Purify water with unscented household bleach

    Regular 5–6% sodium hypochlorite bleach is a WHO-recognized emergency water treatment when you have no filter or fire.

    1. Filter cloudy water through cloth or let it settle until reasonably clear.
    2. Add 2 drops of unscented 5–6% household bleach per liter of clear water; use 4 drops per liter if the water is cold or still turbid.
    3. Stir and let stand for at least 30 minutes.
    4. The water should have a slight chlorine smell. If not, repeat the dose and wait another 15 minutes.
    5. If chlorine taste is too strong, pour between two clean containers a few times to aerate before drinking.

    Warning: Never use scented, color-safe, or additive bleach. Bleach does not reliably kill Cryptosporidium — boil or filter when parasites are a concern.

  • Water skill

    Water

    20 min

    Melt snow and ice for drinking water

    Snow is 90% air. Melting it wrong wastes fuel, scorches your pot, and can trigger cold injuries.

    1. Start with a small amount of liquid water in the pot — even a couple of ounces — before adding snow.
    2. Add snow gradually, stirring so the ice contacts water rather than dry pot metal.
    3. Prefer ice or hard, dense snow over fresh powder — you get four times more water per volume.
    4. Bring to a rolling boil for 1 minute (3 minutes above 6,500 ft) before drinking to kill pathogens from animal fecal contamination.
    5. Insulate the pot and store extra water in bottles kept close to your body so it doesn't refreeze.

    Warning: Never eat snow directly for hydration — it drops your core temperature and burns calories your body cannot afford to lose.

  • Water skill

    Water

    10 min

    Collect water with a transpiration bag

    A clear plastic bag tied around a leafy branch on a sunny day can yield a cup or more of drinkable water.

    1. Pick a non-toxic, leafy branch of a healthy tree in direct sun — birch, maple, and most conifers work well.
    2. Slip a clean, clear plastic bag over as much foliage as possible and tie the mouth tightly around the branch.
    3. Angle a low corner of the bag downward so water collected during transpiration pools in one spot.
    4. Leave for 3–5 hours in strong sun; a mature branch can produce a half-cup to a full cup of water.
    5. Drink directly or filter through cloth if debris got into the bag.

    Warning: Never use this on toxic species (oleander, yew, poison ivy, poison sumac). If you can't identify the tree, don't drink the water.

  • Water skill

    Water

    30 min

    Dig a gypsy well beside stagnant water

    A hole dug next to a stagnant pond fills with pre-filtered water through the soil layer — much cleaner than the pond itself.

    1. Choose a spot 3–5 feet back from the water's edge on the uphill side if possible.
    2. Dig a hole about a foot across and deep enough that the bottom sits below the pond's waterline.
    3. Let the first fill of muddy water seep in and bail it out completely — repeat 2–3 times.
    4. Once the well refills with clearer water, scoop it gently to avoid stirring up sediment.
    5. Still filter and boil or chemically treat before drinking — a gypsy well removes debris, not pathogens.

    Tip: Line the sides with sticks or rocks to keep the walls from collapsing back into your water source.

  • Shelter skill

    Shelter

    60 min

    Build a lean-to shelter

    A lean-to is the fastest heat-retaining shelter when you have a fire — one wall reflects, the other opens to the flame.

    1. Find two trees 6–8 feet apart, or set two forked uprights, and lash a strong ridgepole between them at head height.
    2. Lean straight poles from the ridgepole to the ground at roughly a 45° angle, spaced a hand-width apart.
    3. Weave finer branches horizontally through the poles to create a lattice.
    4. Thatch from the bottom up with overlapping bark slabs, boughs, or leafy branches — each layer overlaps the one below like shingles.
    5. Build your fire and reflector wall parallel to the open face, about 4–6 feet away.

    Tip: Face the open side away from prevailing wind and toward your fire. Even a small breeze on the opening kills the shelter's warmth.

  • Shelter skill

    Shelter

    45 min

    Build an A-frame emergency shelter

    An A-frame sheds rain from both sides and is the go-to when you have no fire — it retains body heat inside a compact space.

    1. Lash or wedge a ridgepole between a low tree fork and a shorter forked stick driven into the ground.
    2. Lean pairs of ribs against the ridgepole from both sides, angled at about 45°, spaced a hand-width apart.
    3. Add a horizontal lattice of finger-thick sticks over the ribs.
    4. Thatch heavily with leaves, boughs, or grass — at least a forearm-thick layer to shed rain and hold heat.
    5. Stuff the interior with dry debris to sleep on and pack extra debris against your body once inside.

    Warning: Never run an open flame inside an enclosed A-frame — this is a body-heat shelter only.

  • Shelter skill

    Shelter

    15 min

    Rig a plow-point tarp shelter

    One corner tied high, opposite two staked low — the fastest one-tarp storm shelter for a solo camper.

    1. Tie one corner of a square tarp to a tree or pole at chest height.
    2. Stake the diagonally opposite corner directly to the ground with a stout stake and taut cord.
    3. Stake the two remaining side corners out low on either side to form a wide triangular opening.
    4. Adjust tension until the tarp is drum-tight — a loose tarp flaps and collects water in bellies.
    5. Aim the tall opening 90° away from the wind, then build your fire in front of it if conditions allow.

    Tip: If the wind shifts, loosen the high corner, rotate the whole shelter, and re-tension in under a minute — no need to rebuild.

  • Shelter skill

    Shelter

    45 min

    Thatch a shelter to shed rain

    Thatching by shingle principle — bottom up, overlapping — turns loose vegetation into a working roof.

    1. Build a lattice frame with horizontal ribs no more than a hand-span apart.
    2. Start at the lowest rib and lay bundles of boughs, grass, or bark with tips pointing down and butts pointing up.
    3. Overlap each new bundle at least halfway over the one below.
    4. Work all the way to the ridge, packing each course tight against the one under it.
    5. Test by running a hand along the outside — you should not feel any gap where sky is visible through the thatch.

    Tip: A rule of thumb: if you can see daylight through your thatch when you lie under it, it will leak in a real rain.

  • Navigation skill

    Navigation

    5 min

    Use moss and stars for rough direction

    Moss and star tricks are approximate but useful when you have no compass and no sun.

    1. In the Northern Hemisphere, look for Polaris — find the two 'pointer' stars at the end of the Big Dipper's cup and follow them to the moderately bright star at the end of the Little Dipper's handle.
    2. Polaris marks true north within about 1°; face it and your right shoulder points east, your left shoulder points west.
    3. By day, in dense old-growth woods, moss tends to be heavier on the shaded, damper side of trees — in temperate northern forests that's usually the north side, but check multiple trees.
    4. Confirm with a second cue (sun, wind, water flow) before committing to a direction.
    5. Draw an arrow on the ground pointing to your chosen bearing before you move, so you don't lose it.

    Warning: Moss grows on the wettest side, not necessarily the north side. Never rely on one tree — sample many and average.

  • Navigation skill

    Navigation

    5 min

    Use an analog watch as a compass

    In sun, an analog watch face gives you a rough bearing accurate enough to hold a straight line.

    1. Hold the watch flat, face up.
    2. In the Northern Hemisphere, point the hour hand at the sun.
    3. Bisect the angle between the hour hand and 12 o'clock — that midpoint line points south.
    4. In the Southern Hemisphere, point 12 at the sun instead and bisect toward the hour hand — that midpoint points north.
    5. Adjust one hour back during daylight saving time so the calculation uses solar time.

    Tip: This is a rough method — accurate within 10–20° depending on latitude and season. Use it to hold direction, not to pinpoint locations.

  • Navigation skill

    Navigation

    10 min

    Navigate to a linear feature with aiming off

    Deliberately steering left or right of your target guarantees you know which way to turn when you hit a road, river, or ridge.

    1. Identify a linear feature (road, river, powerline, coast) that runs across your line of travel and passes through or near your destination.
    2. Instead of aiming directly at the destination, choose a bearing 5–10° to one side.
    3. Travel that bearing until you hit the linear feature.
    4. You now know with certainty whether the destination lies to your left or right along that feature.
    5. Turn and follow the feature until you reach the destination.

    Tip: This trades a small amount of extra walking for total certainty about which way to turn. It's especially valuable in poor visibility.

  • Navigation skill

    Navigation

    10 min

    Walk a straight line without a compass

    Humans drift in circles without external references — line up landmarks in advance to stay straight.

    1. Pick a distinctive landmark in your direction of travel — a tall tree, boulder, or notch on a ridge.
    2. Line up a second landmark between you and the first, closer to you.
    3. Walk toward the closer landmark, keeping the far one behind it in line.
    4. When you reach the near landmark, pick a new landmark beyond the far one and repeat.
    5. If visibility drops, use sound direction (a stream, wind on a slope) or send a companion ahead to serve as a moving landmark.

    Tip: In featureless terrain, plant a stick every 50 paces and line up the last two — you can see your line by looking back.

  • Food skill

    Food

    20 min

    Use cattail as an emergency food

    Cattail is one of the most calorie-rich wild foods on the continent — the 'supermarket of the swamp' — and edible in all four seasons.

    1. Positively identify cattail: tall bladed leaves and the distinctive brown hot-dog seed head. It grows only in shallow standing fresh water.
    2. In spring, peel young shoots at the base and eat the tender white core raw or cooked like leek.
    3. In late spring, boil the green immature flower heads like corn on the cob.
    4. In summer, collect the yellow pollen by shaking flower heads into a bag and use it as a flour extender.
    5. In fall and winter, dig the starchy rhizomes, peel, and either roast whole or crush in water to separate the starch.

    Warning: Only harvest cattail from clean water. Cattail bioaccumulates heavy metals and agricultural runoff from polluted sources.

  • Food skill

    Food

    25 min

    Set a figure-four deadfall trap

    A simple three-stick trigger drops a heavy weight when a small animal disturbs the baited trigger stick.

    1. Cut three sticks: a vertical post, a diagonal, and a horizontal trigger — each about pencil-thick and 6–8 inches long.
    2. Cut a chisel point on top of the post, a matching notch on the top of the trigger, and a locking notch where the diagonal crosses the post.
    3. Assemble so the diagonal locks between the post's chisel point and the trigger's notch, holding a flat weight (rock, log slab) above.
    4. Bait the outboard end of the trigger with something the target animal actively seeks in the current season.
    5. Set several traps along runs and near feeding sign — check at least twice daily and dispatch caught animals immediately.

    Warning: Trapping laws vary widely. In non-survival conditions, only trap where legal, in season, and with a valid license.

  • Food skill

    Food

    15 min

    Gut and clean a small game animal

    Cleaning a squirrel or rabbit within an hour of the kill prevents spoilage and gets useful meat off a small carcass.

    1. Make a shallow cut through the skin and belly wall from breastbone to pelvis, careful not to puncture the gut.
    2. Reach in, sever the diaphragm around the ribcage, and pull all internal organs out in one connected mass.
    3. Cut around and remove the anus and any waste-carrying tissue with a clean margin.
    4. Rinse the body cavity thoroughly with clean water and let it drain.
    5. Skin by pulling firmly toward the head or tail depending on species, then quarter and cook thoroughly.

    Warning: Never eat any animal that looked sick, had visible parasites, ulcers, spots on the organs, or unusual smell. Cook all wild meat well-done.

  • Food skill

    Food

    45 min

    Build a fish basket trap

    A conical willow basket set in a narrow channel can catch panfish, minnows, and crayfish while you attend to other tasks.

    1. Cut a bundle of long, flexible willow or dogwood switches.
    2. Bind one end of the bundle tight, then splay the switches into a cone shape and weave horizontal ribs around them.
    3. Weave a second, smaller cone that fits inside the mouth of the first, opening inward — this is the funnel that lets fish in but not out.
    4. Set the trap in a narrow channel, at an eddy tail, or in the outflow of a beaver dam, with the funnel facing upstream.
    5. Bait with crushed grasshoppers, worms, or fish scraps and check every 4–6 hours.

    Warning: Fish traps are illegal in most jurisdictions outside a documented survival emergency. Know your local laws before setting one.

  • Ice & Cold skill

    Ice & Cold

    5 min

    Use a vapor barrier liner in extreme cold

    In deep cold, moisture from your body destroys insulation. A vapor barrier keeps sweat out of your down or synthetic layer.

    1. Choose a non-breathable liner — trash-bag plastic, coated nylon, or a purpose-built VBL sock or shirt.
    2. Wear the liner directly against skin or over a thin base layer, and put your insulation over the liner.
    3. Dress cool on the move — the liner traps moisture, so you'll feel damp inside but your insulation stays dry.
    4. At camp, remove the liner and dry your base layer against your body inside your sleeping bag.
    5. Use only when temperatures stay below about -15°F (-26°C). Above that, sweat management outweighs insulation protection.

    Warning: Vapor barriers can macerate skin during heavy exertion. Watch for hot spots and stop to dry if any skin surface feels sodden.

  • Ice & Cold skill

    Ice & Cold

    15 min

    Insulate under your body, not just over

    The ground pulls heat out of you faster than cold air. Two-thirds of your insulation should be underneath.

    1. Never sleep directly on cold ground, snow, or bare rock — you will lose heat you cannot replace.
    2. Build a raised bed of dry debris at least a hand-span thick — dry conifer boughs, dead leaves, or grass — and compress it slightly under your weight.
    3. Add a second layer of finer, softer material on top for comfort.
    4. If you have a foam pad, keep it as your closest layer to the ground; put a sleeping bag or emergency blanket on top of the pad, not under it.
    5. Rebuild loft each night — compressed debris insulates far less than fresh, lofted debris.

    Tip: Test the bed by lying on it for 5 minutes before dark. If your back feels cold, add another 4 inches of debris before you commit to sleeping.

  • Ice & Cold skill

    Ice & Cold

    5 min

    Recognize the signs of hypothermia in a companion

    Early hypothermia is treatable in the field. Late-stage hypothermia is a medical emergency — knowing the difference saves lives.

    1. Mild (95–90°F core): shivering, clumsy hands, slow decision-making, sometimes 'the umbles' — stumbles, mumbles, fumbles, grumbles.
    2. Moderate (90–82°F core): shivering may stop, confusion increases, coordination collapses, speech slurs.
    3. Severe (below 82°F core): no shivering, unresponsive or unconscious, weak pulse, very slow breathing.
    4. For mild: stop, insulate, add calories and warm sweet drinks, get moving once rewarmed.
    5. For moderate or severe: treat as a medical emergency, handle very gently, insulate against further heat loss, and evacuate. Rough handling can trigger cardiac arrest.

    Warning: Never give alcohol to a hypothermic person. Never rub or immerse severely hypothermic patients in hot water — passive rewarming only until you reach medical care.

  • Ice & Cold skill

    Ice & Cold

    10 min

    Prevent trench foot and non-freezing cold injuries

    Wet feet in above-freezing cold cause tissue damage as serious as frostbite — and it happens without you noticing.

    1. Change into dry socks at least twice a day whenever conditions are cold and wet.
    2. Dry wet socks against your body inside your shirt or sleeping bag; never leave feet in wet socks overnight.
    3. Wiggle toes and pump feet every time you sit down for more than a few minutes.
    4. Air your feet completely at least once a day — off, dry, and warmed for 10 minutes before re-socking.
    5. Watch for early signs: numb, pale, cold feet that don't rewarm quickly. Stop and warm them the moment you notice.

    Warning: Once tissue is damaged, symptoms can last months and lead to permanent nerve injury. Prevention is the entire treatment.

  • Signaling skill

    Signaling

    10 min

    Signal for rescue with the rule of three

    Three of anything — fires, whistle blasts, gunshots, flashes — is the international distress signal recognized by rescuers.

    1. Build three signal fires in a triangle or straight line with 30–50 feet between them, in the largest clearing you can find.
    2. Prep them fully but light only when you hear or see aircraft or searchers — the goal is instant ignition, not constant burn.
    3. Have wet leaves, green boughs, or damp moss ready to throw on for thick smoke by day.
    4. By night, add dry fuel for tall, bright flames.
    5. If you have a whistle, use three sharp blasts, pause, repeat. Three flashes with a mirror or headlamp follow the same pattern.

    Tip: Rescuers look for straight lines and geometric shapes because they don't occur in nature. A single fire may be dismissed; three in pattern is unmistakable.

  • Signaling skill

    Signaling

    5 min

    Signal SOS with light, sound, or ground marks

    SOS is the most universally recognized distress signal — three short, three long, three short — with any signaling method.

    1. Light or sound: three short bursts, three long bursts, three short bursts, pause, repeat.
    2. With a whistle: three quick chirps, three 2-second blasts, three quick chirps.
    3. With a flashlight or mirror: three short flashes, three long flashes, three short flashes toward the observer.
    4. On the ground: stamp or scrape 'SOS' in letters at least 10 feet tall in snow, sand, or a clearing.
    5. Keep repeating in cycles with a pause between; a single SOS is easy to miss.

    Tip: The pattern matters more than the medium. A rescuer who hears three-three-three anything will investigate.

  • Signaling skill

    Signaling

    5 min

    Choose high-contrast colors for signal panels

    Contrast beats color. What matters is that your signal looks nothing like the ground around it.

    1. In snow or on light rock: use dark materials — a garbage bag, dark jacket, or scorched wood.
    2. In green forest or grass: use bright orange, yellow, or blaze pink if you have them; a silver space blanket also works.
    3. On dark ground or wet dirt: light or reflective materials — foil, mirrors, or white cloth.
    4. Weight the corners and edges with rocks so the panel doesn't blow away.
    5. Combine ground panels with a geometric shape — a big X or triangle — so aircraft recognize it as human-made.

    Tip: Bright red is the color humans notice fastest in natural settings. If you have a red jacket, keep it on top when signaling.

  • Tools & Cordage skill

    Tools & Cordage

    10 min

    Split wood safely with a knife (batoning)

    Batoning is a controlled technique for splitting small wood with a fixed-blade knife when no axe is available.

    1. Use only a full-tang, fixed-blade knife with a spine at least a quarter-inch thick — folding knives will fail.
    2. Set the round upright on a stable log platform, place the knife edge across the top, and tap the spine with a wooden baton (never metal).
    3. Once the blade is seated, strike the tip of the spine with progressively firmer taps until the wood splits.
    4. Keep your off hand well clear of the blade and split path.
    5. Choose small rounds (wrist-thick or less); larger wood requires an axe, not a knife.

    Warning: Batoning stresses knives. Never baton knots, and stop the moment the blade shows lateral flex or the handle scales loosen.

  • Tools & Cordage skill

    Tools & Cordage

    30 min

    Twist cordage from plant fiber

    Two-ply reverse twist cordage from plant fiber is stronger than either strand alone and holds up for real work.

    1. Harvest long, flexible fiber — inner bark of dead cedar, willow, or basswood; nettle stems; yucca leaves; or dogbane.
    2. If needed, pound and separate the fibers by rolling between palms until they're soft and uniform.
    3. Bundle the fibers into a strand as thick as bootlace, tie a loop at the middle, and twist one strand away from you between thumb and forefinger.
    4. Simultaneously twist the second strand the same direction, then wrap them around each other in the opposite direction.
    5. Splice in new fiber before old strands run out by adding fresh material into the untwisted end and continuing the twist.

    Tip: Test each finished length by pulling hard — cordage that fails now is better than cordage that fails on a shelter ridgepole in the rain.

  • Tools & Cordage skill

    Tools & Cordage

    15 min

    Build a hobo stove from a tin can

    A large tin can with holes cut for airflow makes a fuel-efficient stove that concentrates heat under a pot.

    1. Take a large clean can (46 oz coffee or #10 food can), open the top completely, and clean any residue.
    2. Punch a ring of thumb-sized ventilation holes around the top edge with a knife tip or punch.
    3. Cut a fuel door in the side near the bottom — about 2 inches wide by 2 inches tall — bending the flap up and inside.
    4. Punch a second ring of intake holes around the bottom edge to feed air to the fire from below.
    5. Set on stable ground, feed pencil-thick sticks through the fuel door, and set your pot directly on top.

    Tip: A hobo stove needs 90% less wood than an open fire for the same cooking task. Great for boil-only meals when fuel is scarce.

  • First Aid skill

    First Aid

    5 min

    Improvise a tourniquet for life-threatening bleeding

    A tourniquet is the fastest way to stop massive limb bleeding when direct pressure fails or is impossible.

    1. Use a wide (2+ inches), non-elastic strap — belt, folded cloth, or webbing. Never use paracord or wire alone — they cut tissue.
    2. Place the tourniquet 2–3 inches above the wound, closer to the torso, but never over a joint.
    3. Tighten until bright red bleeding fully stops — this will hurt; that is expected and necessary.
    4. Secure the windlass (stick, knife, pen) so it cannot unwind.
    5. Write the time of application on the patient's forehead or the tourniquet itself. Do not remove until qualified medical care is available.

    Warning: A tourniquet is for life-threatening bleeding only. Use direct pressure and wound packing first for anything less than arterial spray or amputation.

  • First Aid skill

    First Aid

    15 min

    Clean a wound in the field

    Infection risk is high in the outdoors. Cleaning a wound within the first hour dramatically improves outcomes.

    1. Wash your own hands with soap and clean water before touching the wound.
    2. Irrigate the wound aggressively with clean drinking water — 1 liter minimum for anything larger than a scratch, delivered under pressure (from a squeezed bag, syringe, or bottle with a small hole in the cap).
    3. Remove visible debris with clean tweezers if possible; scrub deeply embedded dirt with clean cloth or gauze.
    4. Cover with a clean, dry dressing — sterile if available, or the cleanest cloth you have.
    5. Change dressings daily and check for infection signs: expanding redness, warmth, pus, red streaks, or fever.

    Warning: Never close a heavily contaminated wound in the field. Cover it and let it drain — a closed dirty wound abscesses far worse than an open clean one.

  • First Aid skill

    First Aid

    20 min

    Manage a sprained ankle in the backcountry

    A sprained ankle can strand you if handled wrong. Support early and you can often walk out on it.

    1. Sit, elevate, and cool the ankle for 15–20 minutes with cold water, snow, or a wet bandana — this reduces swelling that will otherwise lock the joint.
    2. Assess: if you can bear weight cautiously without a grinding sensation or extreme pain, it's likely a sprain rather than a fracture.
    3. Support with a figure-8 wrap: run cloth or an elastic bandage under the arch, across the top of the foot, around the back of the ankle, and back across in an X pattern.
    4. Re-lace the boot firmly enough to stabilize the ankle but not tight enough to cut circulation. Check toes for warm color regularly.
    5. Walk out slowly using a trekking pole or stout stick on the injured side. Rest and re-cool at every break.

    Warning: Numbness, severe deformity, inability to bear any weight, or grinding sounds mean a possible fracture. Splint in place and get help rather than walking on it.

  • Weather skill

    Weather

    10 min

    Read cloud formations to forecast weather

    Clouds give 6–24 hours of advance warning about incoming weather when you know what to look for.

    1. High wispy cirrus 'mare's tails' invading a clear sky mean a warm front is 12–24 hours out — expect rain within a day.
    2. Cirrus thickening to a smooth cirrostratus veil (halo around sun or moon) confirms front is closer — often within 12 hours.
    3. Middle-level altostratus turning to low nimbostratus with a lowering, darkening ceiling means active precipitation is beginning.
    4. Tall cumulus towering into anvil-topped cumulonimbus in warm afternoons means thunderstorms — get off ridges and out of exposed water within an hour.
    5. Clearing to fair-weather cumulus with flat bases and blue sky between means the system has passed.

    Tip: Watch cloud motion, not just shape. Fast-moving clouds mean strong upper winds and rapidly changing weather.

  • Weather skill

    Weather

    5 min

    Reduce your lightning risk in the field

    You cannot make yourself lightning-proof, but you can dramatically reduce the odds of being struck.

    1. The moment you hear thunder, start moving off exposed terrain — ridges, summits, open meadows, and shorelines.
    2. Head to lower ground, ideally uniform terrain in a stand of shorter trees of similar height.
    3. Avoid isolated tall objects (single trees, poles, boulders taller than the surroundings).
    4. If you cannot reach shelter, spread your group so any strike affects only one person, and squat on the balls of your feet on a foam pad — never lie down.
    5. Wait 30 minutes after the last thunder before returning to exposed terrain.

    Warning: Metal frame packs, trekking poles, and wet ropes conduct current. Set them aside 30 feet from you during a storm.

  • Weather skill

    Weather

    10 min

    Read wind and pressure changes for incoming weather

    Even without a barometer, your body and the landscape give clear cues that pressure is dropping and weather is turning.

    1. A sudden shift in wind direction — especially clockwise in the Northern Hemisphere — often signals an approaching front.
    2. Rapidly rising wind speed with dropping temperature is a classic cold front sign — squalls or thunderstorms likely within hours.
    3. Smoke that used to rise straight now flattens and settles — atmospheric pressure has dropped, weather is deteriorating.
    4. Birds fly lower, insects bite more aggressively, and joint pain worsens as pressure falls — take these as your body's barometer.
    5. Once wind slackens, temperature stabilizes, and smoke rises straight up again, the weather is settling.

    Tip: The old sailors' rhyme holds up: 'Red sky at night, sailors' delight; red sky in morning, sailors take warning.' A red morning sky often means a system is approaching from the west.

  • Weather skill

    Weather

    5 min

    Predict overnight frost

    Frost catches campers by surprise. A few end-of-day cues warn you to insulate harder before dark.

    1. Check the sky at sunset — a clear sky lets ground heat radiate to space; frost is likely if temperatures are near freezing and skies stay clear all night.
    2. Note the wind — dead calm plus clear skies plus low humidity is the classic frost recipe.
    3. Camp higher on a slope rather than in a valley or hollow — cold air pools in low spots and frost hits them first.
    4. If temperature drops below about 40°F (4°C) at sunset with clear skies and calm wind, prepare for frost by dawn.
    5. Cover any exposed water containers and stow water bottles inside your sleeping bag so they don't freeze.

    Tip: Look for spider webs beaded with dew at sunset — visible dew often means the air is cooling toward the dew point and frost is possible if temperatures keep falling.

  • Field Skills skill

    Field Skills

    30 min

    Leave no trace of a fire

    A properly disposed fire leaves the site indistinguishable from surrounding ground — good practice everywhere, not just in wilderness areas.

    1. Burn all wood to fine ash — no charred chunks remaining.
    2. Drown the ashes with water, stir, and drown again. Repeat until you can put your bare hand on the ash without any warmth.
    3. Scatter the cold wet ashes broadly outside the camp area — never in one heap.
    4. Return any rocks used for a ring to where you found them, dirty side down.
    5. Sweep the area with a branch to disguise scorch marks and lift compressed vegetation.

    Warning: The single most common cause of wildfire is an incompletely drowned fire. If you can feel any warmth in the ashes, it's not out.

  • Field Skills skill

    Field Skills

    20 min

    Cache food safely in bear country

    In bear country, every scented item — food, toothpaste, sunscreen — must be secured away from your sleeping area.

    1. Use a certified bear canister where required, or an Ursack tied to a tree trunk.
    2. For hangs, find a branch at least 15 feet up and 4 feet out from the trunk, with the food bag suspended 5 feet below the branch.
    3. Use the counterbalance or PCT hang method so a bear cannot swat the bag down by yanking a rope.
    4. Store food, cooking gear, and any scented items at least 100 yards downwind from your tent.
    5. Never keep food, snack wrappers, or scented items in your tent, even in a pack.

    Warning: A bear that gets a human food reward once will return, and that bear often ends up destroyed by wildlife officers. Bad food storage kills bears.

  • Field Skills skill

    Field Skills

    2 min

    Estimate remaining daylight with your hand

    The width of your fingers between the sun and the horizon gives a surprisingly accurate estimate of hours until sunset.

    1. Extend your arm fully, palm facing you, fingers together and horizontal.
    2. Align the bottom edge of your little finger with the horizon.
    3. Count the fingers stacked between the horizon and the sun — each finger is approximately 15 minutes of daylight.
    4. If the sun sits higher than one hand, stack your other hand on top and continue counting.
    5. Round down to give yourself a margin for camp setup before dark.

    Tip: Start setting up camp when you have two hands (about two hours) of daylight left. Rushing at dusk is when cuts, burns, and lost gear happen.

  • Field Skills skill

    Field Skills

    15 min

    Cross a swift stream safely

    Moving water is one of the leading causes of backcountry deaths. Cross rarely, carefully, and only when you have to.

    1. Scout upstream and downstream for a wider, shallower spot; narrow spots are deep and fast.
    2. Unclip your pack's hip belt and sternum strap so you can shed it fast if you fall.
    3. Face upstream, use a stout pole for a third point of contact, and shuffle sideways rather than lifting your feet high.
    4. Cross at an angle, moving downstream at about 45°, so the current helps push you across.
    5. If you slip, go on your back with feet pointed downstream and use them to fend off rocks until you can swim to shore.

    Warning: Water above the knees moving faster than a walking pace can knock down an adult. If the crossing looks marginal, wait for morning — mountain streams often drop overnight.

  • Field Skills skill

    Field Skills

    5 min

    Estimate distance in the field

    Quick tricks give you distance estimates good enough for route planning without a rangefinder.

    1. Object size at arm's length: a person clearly recognizable but small is about 100 yards; head just a dot is about 200 yards; body only visible is about 300 yards.
    2. Sound and light: count the seconds between a lightning flash and its thunder — every 5 seconds is roughly one mile.
    3. Pace count: know your average pace over 100 meters (usually 60–70 double-paces for adults) and count as you walk.
    4. Terrain multiplier: rough or steep terrain roughly doubles the time — not the distance — you'll need to cover it.
    5. Verify with a map whenever you can. Estimation compounds error over long distances.

    Tip: Practice on a known distance at home. Most people badly underestimate how far a mile really looks across open country.

  • Navigation skill

    Navigation

    10 min

    Read a specific slope from topographic contours

    Contour lines encode slope steepness, direction, and specific landforms if you know how to read them.

    1. Check the map's contour interval (usually 20, 40, or 100 feet) — every line represents that much elevation change.
    2. Close-packed lines mean steep terrain; widely spaced lines mean gentle terrain.
    3. V-shapes pointing uphill are drainages and streams; V-shapes pointing downhill are ridges.
    4. Concentric closed loops mean summits; loops with tick marks pointing inward mean depressions or basins.
    5. Estimate slope steepness: contours a millimeter apart on a 1:24,000 map with 40-foot intervals mean roughly a 45° slope — near the limit of walkable.

    Tip: Trace a proposed route with your finger and count contour crossings — every crossing is one contour interval of climb or descent.

  • Water skill

    Water

    5 min

    Adjust water boil time for altitude

    Water boils at lower temperatures at high altitude, so you need longer boil times to reliably kill pathogens.

    1. Below 6,500 feet (2,000 m): a rolling boil for 1 minute kills all common waterborne pathogens.
    2. Above 6,500 feet: extend to a full 3 minutes at a rolling boil.
    3. Do not rely on 'just to a boil' at any elevation — the water must maintain a full rolling boil for the timed interval.
    4. For extra confidence in remote alpine environments, use both a filter and a boil.
    5. Filter cloudy water through cloth before boiling so heat doesn't waste on sediment.

    Warning: Boiling does not remove chemical contamination — heavy metals, salts, and industrial pollutants stay in the water. Only pathogens die.

  • Shelter skill

    Shelter

    15 min

    Anchor a tarp or tent for a storm

    Standard stakes fail in wind and wet ground. Storm anchors keep your shelter down when weather turns.

    1. Replace stakes with deadman anchors — bury a stick, rock, or stuff sack full of gravel horizontally with the guyline tied around it.
    2. In snow, dig a T-slot: cut a channel across the guy direction, lay a stake or stuff sack horizontally, and pack snow over it.
    3. Add secondary guylines from mid-panel tie-outs on every wall — not just corners.
    4. Angle guylines at 45° from the tarp to the anchor for the strongest pull-through-shear geometry.
    5. Re-tension every 2–4 hours during a long storm as ground softens and cords stretch when wet.

    Tip: Cut short (4-inch) toggles from sticks and larks-head your cord around them — they hold better than tied loops when guys need to be adjusted repeatedly.

  • Tools & Cordage skill

    Tools & Cordage

    15 min

    Sharpen an axe with a file

    A dull axe is more dangerous than a sharp one. A basic mill file returns a working edge in minutes.

    1. Wedge the axe head firmly — vise, split log, or between two logs staked to the ground.
    2. Push the file diagonally across the bit from heel to toe, edge trailing, in one direction only.
    3. Keep the file flat against the existing bevel — don't rock it. Consistent angle is more important than pressure.
    4. Alternate sides after every 10 strokes to keep the bevel even; work until you feel a small burr along the entire edge on the opposite side.
    5. Remove the burr with a few gentle strokes of a smooth stone or leather strop.

    Warning: Always push the file away from your body and keep your other hand behind the file, never in front of the edge.

  • Navigation skill

    Navigation

    15 min

    Navigate by dead reckoning

    Dead reckoning combines bearing and distance to estimate your position without landmarks or GPS.

    1. Note your start point exactly — grid coordinate, prominent landmark, or known location.
    2. Record the bearing you're traveling on with a compass — write it down, don't trust memory.
    3. Track distance by pace count or estimated time × speed as you move.
    4. Whenever you change bearing, log the new heading and reset your distance count.
    5. At any point, you can plot the current estimated position on the map by drawing each leg in sequence from the start.

    Tip: Dead reckoning accumulates error. Confirm and reset your position at every known feature (a river crossing, trail junction, distinct peak) you pass.

  • Food skill

    Food

    20 min

    Improvise a fishing hook

    A gorge hook or thorn hook can catch panfish and small trout when you have no store-bought tackle.

    1. Gorge hook: cut a straight sliver of hardwood 1–2 inches long, sharpen both ends, and notch the center so line ties around it.
    2. Bait with a worm, grub, or insect so the gorge is hidden lengthwise inside the bait.
    3. When a fish swallows the bait, it also swallows the gorge; a firm pull rotates it crossways in the throat.
    4. Alternatively, use a strong thorn tied to a stem so the thorn projects at an angle — same principle as a J-hook.
    5. Set multiple lines and check often; improvised hooks work but they lose fish that manufactured hooks would hold.

    Warning: Improvised fishing techniques are only legal in a documented survival emergency in most areas. Know local regulations.

  • Water skill

    Water

    15 min

    Boil water in a plastic bottle over coals

    Water inside a plastic bottle protects the plastic from melting long enough to bring the water to a boil — a genuine emergency trick.

    1. Fill a clear plastic bottle (PET, like a common soda or water bottle) completely full — no air gap.
    2. Set the bottle upright directly on hot coals raked to the edge of the fire, not in active flame.
    3. Turn the bottle a quarter-turn every 30 seconds so it heats evenly.
    4. The water will reach a boil while the bottle scorches on the outside; contents remain drinkable.
    5. Handle with sticks or a bandana — the bottle is soft and hot; let it cool before pouring.

    Warning: Emergency use only. Repeated heating of plastic bottles releases chemicals into the water. Use once, then discard the bottle.

  • Food skill

    Food

    180 min

    Cook in an earth oven

    An earth oven bakes fish, roots, and meat with steady buried heat — no pot required and impossible to burn dinner.

    1. Dig a pit about twice the size of what you're cooking, and line the bottom and sides with fist-sized rocks.
    2. Build a hot fire in the pit and burn it hard for 60–90 minutes until the rocks are glowing.
    3. Rake out any large embers, lay a thick pad of green leaves or grass over the rocks, then place food (wrapped in more leaves) on the pad.
    4. Cover with another thick pad of green vegetation, then a layer of dirt sealing all air.
    5. Wait 2–4 hours — small fish and roots take about 2 hours; meat takes 3–4. Open only when ready to eat, since opening halts cooking.

    Tip: Add a stick as a poker before you seal the oven. Pull it out to check without disturbing the whole cover.

  • Field Skills skill

    Field Skills

    10 min

    Repair broken glasses in the field

    A broken pair of glasses in the backcountry becomes a safety problem fast. A few field fixes get you home.

    1. Broken nose bridge: wrap tightly with a strip of cloth tape or duct tape, splinted with a matchstick or twig for rigidity.
    2. Popped-out lens: warm the frame slightly by a fire, gently press the lens back in place, cool it, and check by lightly tapping the frame.
    3. Broken temple arm: splint with a stick or bent hairpin, tape or lash to remaining arm.
    4. Missing screw: replace temporarily with a small wire from a twist tie or a very thin sliver of wood pushed through the hinge hole.
    5. Cracked lens: cover the crack with clear tape on both sides to keep it holding shape until you can replace it.

    Tip: Carry a spare pair of glasses (or your last prescription) in your pack for any multi-day trip. Duct tape is a fix; a spare is a solution.

  • Dig a Dakota fire hole — video thumbnail

    Fire

    25 min

    Dig a Dakota fire hole

    A Dakota fire hole burns hot, hidden, and windproof by drawing air through an underground tunnel.

    1. Dig a vertical pit about 2 feet deep and 1 foot wide where you want the fire.
    2. Dig a second, smaller hole the same depth roughly 1 foot away, connected to the first by a horizontal tunnel at the bottom.
    3. Pile kindling in the main pit and light it; the second hole pulls air in and feeds the flames from below.
    4. Cook on a small grate or lay sticks across the main pit.
    5. When finished, fill both holes with the excavated soil and tamp down.

    Tip: Angle the connecting tunnel slightly upward toward the fire pit so falling embers don't roll into the air intake.

    TA Outdoors — The Dakota Fire Hole

  • Start a fire with a battery and steel wool — video thumbnail

    Fire

    3 min

    Start a fire with a battery and steel wool

    A 9-volt battery and a puff of steel wool make a sparkless, windproof fire starter that works in the rain.

    1. Pull a small wad of fine steel wool (grade 000 or 0000) into a loose, airy ball about the size of a walnut.
    2. Set the wool on a bed of dry tinder, birch bark, or fine grass.
    3. Touch both battery terminals to the wool at the same time.
    4. The wool will glow and burn from the inside out — blow gently to spread the heat into the tinder.
    5. Feed kindling as soon as flames appear.

    Warning: Keep the battery and steel wool separated in your pack. Accidental contact can start a fire inside your bag.

    The Outsider — Fire with Steel Wool & 9V Battery

  • Use a fire piston — video thumbnail

    Fire

    10 min

    Use a fire piston

    A fire piston ignites tinder by compressing air so fast that the heat of compression lights it.

    1. Place a tiny piece of char cloth, true punkwood, or very fine tinder into the notch at the end of the piston rod.
    2. Drop the rod into the cylinder so the tinder sits just inside the mouth.
    3. Hold the cylinder steady and slam the rod down in one fast, firm stroke.
    4. Pull the rod out quickly; the char should be glowing red.
    5. Transfer the ember into a tinder nest and blow it into flame.

    Tip: A dry, well-polished bore and a tight leather gasket are what make compression work. If it gets sluggish, rub a little beeswax or fat on the gasket.

    John McCann — How To Use A Fire Piston

  • Drink from a water vine — video thumbnail

    Water

    10 min

    Drink from a water vine

    In tropical forests, some woody vines carry drinkable water straight from the ground to the canopy.

    1. Look for thick, woody lianas or grape vines climbing from the forest floor into the canopy.
    2. Cut the vine high with a knife and let the cut end drip into your mouth or container.
    3. If no water flows, the vine may be dead or the flow reversed — try cutting lower down or choose another vine.
    4. Collect only what you need; vines are a limited resource and animals depend on them too.
    5. Filter through cloth and purify if possible, especially near human or livestock activity.

    Warning: Some vines exude milky latex that is toxic or irritating. If the sap is white and sticky, don't drink — pick a different vine.

    Axis Off Grid Survival — Jungle Survival Water

  • Dig a snow cave — video thumbnail

    Shelter

    90 min

    Dig a snow cave

    A snow cave traps body heat and blocks wind, turning a deadly storm into a survivable night.

    1. Find deep, stable snow on a lee slope or drift — not avalanche terrain.
    2. Dig an entrance tunnel lower than the sleeping platform so cold air sinks away from you.
    3. Hollow out a domed chamber large enough to lie in; keep the roof at least 1 foot thick.
    4. Poke a vent hole through the roof with a stick to prevent CO₂ buildup.
    5. Line the floor with pads, packs, or boughs and mark the entrance from outside with a ski or branch.

    Warning: Never seal a snow cave airtight. Suffocation from exhaled CO₂ is a real risk without ventilation.

    Ray Mears — Building a Snow Cave

  • Build a wickiup — video thumbnail

    Shelter

    120 min

    Build a wickiup

    A wickiup is a dome-shaped shelter of poles and brush that sheds wind and holds a small fire's warmth.

    1. Set three or more stout poles in a tripod and lean additional poles around them in a cone.
    2. Tie the poles at the top with cordage or green bark strips.
    3. Weave thinner branches horizontally between the poles to create a lattice.
    4. Thatch the outside with grass, reeds, bark, or boughs, overlapping like shingles from bottom to top.
    5. Leave a small smoke hole at the apex and a low doorway you can close with a hide or brush mat.

    Tip: A wickiup is stronger and warmer than it looks. Pack the thatch thick enough that no daylight shows through.

    UglyTent Bushcraft — Wickiup Shelter

  • Build a Mors Kochanski super shelter — video thumbnail

    Ice & Cold

    60 min

    Build a Mors Kochanski super shelter

    A super shelter pairs a reflective front wall with a clear plastic cover to create a warm microclimate in deep cold.

    1. Build a lean-to frame with the open side facing a fire reflector wall.
    2. Hang a space blanket or reflective tarp on the inside back wall.
    3. Drape clear plastic sheeting across the open front, leaving a small gap at the bottom for air and a vent at the top.
    4. Build a long-log fire a body-length away on the other side of the reflector.
    5. The plastic traps radiant heat while the reflector bounces it back toward you.

    Warning: Ventilation is essential. A fully sealed shelter can overheat or build up dangerous CO levels from a fire.

    Mors Kochanski — The Super Shelter

  • Adjust a compass for declination — video thumbnail

    Navigation

    10 min

    Adjust a compass for declination

    Magnetic north and true north are not the same. Declination is the correction that keeps you on the map.

    1. Find the declination value for your area on your map's declination diagram or at magnetic-declination.com.
    2. Determine whether the declination is east or west of true north.
    3. On an adjustable compass, turn the declination screw until the orienting arrow matches the printed declination offset.
    4. If your compass is not adjustable, add east declination to your magnetic bearing or subtract west declination.
    5. Double-check by orienting the map: the compass needle should align with the map's north-south grid when the map is rotated correctly.

    Tip: Declination changes slowly over years and sharply across regions. Always use a current value for the exact area you're in.

    Andrew Skurka — Adjust for Declination & Orient a Map

  • Build a stick-and-shadow sun compass — video thumbnail

    Navigation

    20 min

    Build a stick-and-shadow sun compass

    A shadow stick gives you a full compass rose anywhere the sun is shining and you have 20 minutes to wait.

    1. Push a straight stick into flat ground in full sun.
    2. Mark the tip of the shadow with a stone. Wait 15–20 minutes and mark the new tip.
    3. Draw a straight line through both marks — this is your east-west line, with the first mark to the west.
    4. Stand with the west mark at your left toe and the east mark at your right toe; you are facing north.
    5. Mark north, south, east, and west on the ground so you can travel without re-checking.

    Tip: For a traveling compass, draw the cross at camp and sight along the north line to a distant landmark before you move.

    BattlBox — Stick and Shadow Survival Compass

  • Read trail markers and cairns — video thumbnail

    Navigation

    5 min

    Read trail markers and cairns

    Blazes, cairns, and markers keep you on route — but only if you read them the way the trail builders intended.

    1. Paint blazes: a single blaze means continue straight; a double blaze with the top left means turn left, top right means turn right.
    2. Three blazes in a row often warn of a junction, hazard, or trail end.
    3. Cairns are piles of rocks marking routes above treeline or across slickrock — follow the line of cairns, not just one.
    4. A single rock placed on a cairn may mean 'this is the route'; rocks scattered beside it may mean 'wrong way'.
    5. When in doubt, confirm with a map and compass. Markers can be moved or missing.

    Tip: In some regions, building new cairns is illegal because it confuses other hikers. Add rocks only to existing route cairns.

    SystemRichie — Waymarking, Guidebook & Stage Planning

  • Process acorns into edible flour — video thumbnail

    Food

    120 min

    Process acorns into edible flour

    Acorns are a high-calorie staple once the bitter tannins are leached out.

    1. Collect ripe acorns and discard any with holes, mold, or dark stains.
    2. Shell them by cracking with a rock or hammer, then remove the papery skins.
    3. Grind the nutmeats into coarse meal using a mortar and pestle, two stones, or a blender at home.
    4. Leach the tannins by placing the meal in a cloth bag and running cold water through it until the water no longer tastes bitter.
    5. Spread the meal to dry, then use as flour for porridge, bread, or pancakes.

    Warning: Unleached acorns are high in tannins and will cause nausea. Taste-test the water runoff — if it's bitter, keep leaching.

    Insteading — Eating Acorns: Forage, Store & Cook

  • Make pemmican — video thumbnail

    Food

    180 min

    Make pemmican

    Pemmican is dried meat, rendered fat, and sometimes berries — a shelf-stable, calorie-dense food that lasts for months.

    1. Dry lean meat into jerky until it cracks, not bends.
    2. Pound the jerky into a fine powder or shred it as fine as possible.
    3. Render fat slowly over low heat until the liquid is clear and the solids have separated.
    4. Mix the dried meat with hot rendered fat at roughly 1:1 ratio by weight; add dried berries if you have them.
    5. Pack into a mold or bag while warm, then cool until firm.

    Tip: The fat must fully coat every particle of meat to exclude air and prevent spoilage. Cut open a test piece — no dry meat should be visible.

    2 Guys & A Cooler — Making Pemmican

  • Brew pine needle tea — video thumbnail

    Food

    15 min

    Brew pine needle tea

    Pine needles are rich in vitamin C and make a warming tea when you need a morale boost in the cold.

    1. Positively identify a pine or fir tree — needles grow in bundles of two to five for pines, flat and single for firs.
    2. Avoid yew, Norfolk Island pine, and ponderosa pine, which can be toxic.
    3. Collect a small handful of fresh green needles from young growth.
    4. Chop the needles and steep them in hot — not boiling — water for 5–10 minutes.
    5. Strain and drink. The flavor is citrusy and resinous.

    Warning: Pregnant women should avoid pine needle tea. When in doubt about the species, don't drink it.

    Off The Path Learning — White Pine Needle Tea

  • Survive cold-water immersion — video thumbnail

    Ice & Cold

    10 min

    Survive cold-water immersion

    Cold water kills through cold shock, cold incapacitation, and hypothermia — in that order. Knowing the sequence keeps you alive.

    1. Control your breathing for the first minute — cold shock triggers gasping and hyperventilation.
    2. Keep your head above water and avoid swimming hard; cold incapacitation can rob your strength in minutes.
    3. If you fell through ice, kick horizontally and pull yourself onto solid ice, then roll away from the hole.
    4. Assume the HELP position (Heat Escape Lessening Posture): cross arms over chest and draw knees up to reduce heat loss.
    5. If you're with others, huddle together to share body heat while waiting for rescue.

    Warning: Alcohol speeds heat loss and impairs judgment. Never drink to 'warm up' in a cold-water emergency.

    NASBLA — Cold Water Boot Camp

  • Signal with a whistle — video thumbnail

    Signaling

    5 min

    Signal with a whistle

    A whistle carries farther than a voice and works when you're exhausted. Three blasts is the universal distress call.

    1. Three short blasts = distress or need help.
    2. Three of anything — whistle, flashes, shouts — is recognized as a call for assistance.
    3. Pause after each set of three to listen for a response.
    4. Two blasts can mean 'all clear' or 'come here' within a group, but agree on meanings beforehand.
    5. Blow in bursts; a continuous blast wastes breath and is harder to locate.

    Tip: Carry a whistle on your pack strap or neck lanyard, not buried in a pocket. Seconds matter in moving water or dense brush.

    OSMEtv — Emergency Signals

  • Build a night signal fire — video thumbnail

    Signaling

    30 min

    Build a night signal fire

    At night, flame and light contrast matter more than smoke. A signal fire needs to be seen from the air.

    1. Choose a high, open spot with a clear view of the sky — ridge, clearing, or shoreline.
    2. Build three small fires in a triangle 25 meters apart if you have the fuel and it's safe.
    3. Keep a large supply of dry, fast-burning material ready to throw on when you hear an aircraft.
    4. Use bright flames against dark terrain; against snow, dark smoke from green boughs contrasts better.
    5. Only light when you have reason to believe searchers are nearby — a fire left burning is a fire that can escape.

    Warning: Never build signal fires in dry, windy conditions where embers can ignite surrounding forest. Clear the ground to mineral soil first.

    The Gray Bearded Green Beret — How to Signal for Rescue

  • Carve a bushcraft pot hook — video thumbnail

    Tools & Cordage

    20 min

    Carve a bushcraft pot hook

    A notched pot hook lets you hang a kettle over a fire and adjust the heat by moving the hook up or down.

    1. Cut a green, wrist-thick vertical stake and drive it firmly into the ground beside the fire.
    2. Carve a horizontal arm from a straight branch with a hooked notch at the outboard end.
    3. Cut a series of notches down the upright stake at different heights.
    4. Hang the arm on the upright so the hook points toward the fire; the arm's weight locks it in place.
    5. Hang your pot from the hook and move the arm to a higher or lower notch to boil or simmer.

    Tip: Use green wood for the upright — dry wood can char and weaken over a long fire.

    Woods and Rocks — Build a Pothanger with your Knife

  • Carve a wooden mallet — video thumbnail

    Tools & Cordage

    30 min

    Carve a wooden mallet

    A wooden mallet drives stakes, batons kindling, and pounds fibers without damaging metal tools.

    1. Select a green hardwood branch with a natural fork or side branch for the head.
    2. Cut the handle to a comfortable length — about the distance from your elbow to your fingertips.
    3. Whittle the handle round and smooth, leaving a slight flare where it meets the head.
    4. Shape the head thick and heavy; a short, stout head delivers more force than a long thin one.
    5. Test the balance and trim until it feels like an extension of your arm.

    Tip: Green wood is easier to carve but will crack as it dries. If you want a long-lasting mallet, use seasoned wood and go slowly.

    Bracken Outdoors — Mallet Making

  • Splint a limb in the field — video thumbnail

    First Aid

    20 min

    Splint a limb in the field

    A good splint immobilizes the joints above and below an injury, turning a painful fracture into a walkable problem.

    1. Check circulation, sensation, and movement before and after splinting.
    2. Find rigid material: tent poles, trekking poles, sticks, rolled magazines, or a sleeping pad folded around the limb.
    3. Pad between the splint and the skin with clothing, foam, or grass to prevent pressure sores.
    4. Secure the splint with bandanas, belts, or strips of cloth — snug but not so tight that fingers or toes turn pale.
    5. Immobilize the joint above and below the break, not just the bone itself.

    Warning: If the limb is deformed, cold, numb, or blue below the injury, treat it as a medical emergency and evacuate.

    Instructor Strange — How To Make A Leg Splint

  • Remove a tick safely — video thumbnail

    First Aid

    5 min

    Remove a tick safely

    The faster a tick comes off whole, the lower the risk of disease transmission.

    1. Use fine-tipped tweezers or a dedicated tick remover.
    2. Grasp the tick as close to the skin as possible, near the mouthparts.
    3. Pull upward with steady, even pressure. Do not twist, jerk, or squeeze the body.
    4. If the mouthparts break off, try to remove them with tweezers; if not, leave them and let the skin heal.
    5. Clean the bite with soap and water or an alcohol wipe.

    Warning: Never burn a tick, smother it in petroleum jelly, or twist it. These methods increase the chance of regurgitation and infection.

    Mayo Clinic — Tips to Best Remove Ticks

Educational reference only. Wilderness conditions change fast — practice in low-stakes settings, take a certified wilderness first-aid course, and confirm regional regulations (fire, fishing, foraging, snaring) before you rely on any of these skills in the field.