


16 skills

Shelter
45 minDig a one-night snow trench
A trench is faster than a quinzhee and warmer than a tarp when you have snow but no time.
- Find snow at least chest-deep. Test-probe with a stick for hidden rocks and roots.
- Dig a body-length trench slightly wider than your shoulders and knee-deep below the trench floor.
- Roof it with skis, poles, or sturdy branches laid across the top, then blocks of cut snow.
- Leave a small vent hole for CO₂ and mark it from outside with a ski or stick.
- Line the floor with a pad or thick bough bed before you get in.
Warning: Never seal a snow shelter completely — suffocation is a real risk without a vent.
Gone Feral — Snow Trench Shelter

Navigation
5 minRead a topo map in one minute
Contour lines tell you shape and steepness — the whole map is in the spacing.
- Close-spaced lines = steep. Wide-spaced = gentle.
- V's pointing uphill = drainage or creek. V's pointing downhill = ridgeline.
- Circles inside circles = a summit; hachured circles = a depression.
- Blue = water, green = vegetation, white = open/rock/snow, brown = elevation.
- Check the contour interval in the legend before guessing elevation.
REI — How to Read a Topo Map

Ice & Cold
5 minTell if ice is safe to cross
Color, thickness, and history — check all three before you step out.
- Clear blue or black ice is the strongest. White or opaque ice is half as strong. Grey ice is unsafe — leave it alone.
- Thickness rules of thumb on clear ice: 4 in / 10 cm to walk, 5-7 in / 12-18 cm for a snowmobile, 12+ in / 30+ cm for a light truck.
- Drill or chop test holes every 50 ft on unknown ice and measure — don't guess.
- Skip inlets, outlets, springs, currents, and any area with cracks radiating from a point.
- Avoid ice near docks and pilings; dark objects absorb heat and thin the ice around them.
Warning: No ice is guaranteed safe. If you break through, kick horizontally, get your arms flat on solid ice, and roll — don't try to climb.
Jason Mitchell — Ice Safety Checklist

Ice & Cold
5 minPrevent frostbite on hands
Once your fingers stop hurting in the cold, you have about 20 minutes.
- Layer: thin liner glove for dexterity, insulated shell for warmth. Never take both off at once.
- Keep hands moving. Fists, windmilling arms, wiggle fingers inside the glove.
- Never handle cold metal or fuel with bare skin below freezing — contact frostbite is instant.
- If fingers go numb, warm them under armpits or against a companion's stomach until sensation returns.
- Add a hat — vasoconstriction to the hands worsens fast when the head is cold.
Warning: Do not rub frozen tissue with snow or hold near a fire. Warm slowly with body heat or 100-105 °F water.
Dr. Ebraheim — Frostbite Prevention

Signaling
20 minBuild a signal fire that gets seen
The point of a signal fire is smoke and contrast, not warmth.
- Pick a spot with a wide sky view — a ridge, clearing, or lakeshore. Not under trees.
- Build three fires in a triangle 25 m apart if you have the fuel; three of anything is a distress signal.
- Keep a pile of green boughs, wet moss, or damp grass at each fire, ready to dump on.
- Against snow use dark smoke: green vegetation. Against dark forest use white smoke: damp grass, moss.
- Only light when you actually hear or see a search — smoke ignored is smoke wasted.
Bear Grylls — Perfect Signal Fire

Signaling
10 minGround-to-air signals every pilot knows
Five internationally recognized symbols. Make each one 10 ft / 3 m tall in high-contrast material.
- V = require assistance.
- X = require medical assistance.
- N = no or negative.
- Y = yes or affirmative.
- → (arrow) = proceeding in this direction.
- Stomp them into snow, dig them into sand, or lay them out in dark logs on light ground.
Tip: Size and contrast matter more than shape. From 2,000 ft, small is invisible.
Forest & Lands — Signaling 101

Fire
5 minHarvest and use birch bark tinder
Paper birch bark contains oils that light in rain and snow — one of the most reliable natural tinders in the northern woods.
- Take only loose, curling outer bark from live trees or strip freely from downed birch — never cut the inner bark of a healthy tree.
- Shred a small handful into thin ribbons and tease the edges until they look like feathers.
- Build a small platform of dry twigs, then set the shredded bark on top so air can flow underneath.
- Light from below with a match, spark, or ember; the oils will sustain flame for 30–60 seconds.
- Feed pencil-thick kindling the moment flames catch, and add heavier wood only when the fire stands on its own.
Warning: Girdling a live birch — cutting a full ring of bark around the trunk — will kill the tree. Take only loose outer layers.

Water
20 minMelt snow and ice for drinking water
Snow is 90% air. Melting it wrong wastes fuel, scorches your pot, and can trigger cold injuries.
- Start with a small amount of liquid water in the pot — even a couple of ounces — before adding snow.
- Add snow gradually, stirring so the ice contacts water rather than dry pot metal.
- Prefer ice or hard, dense snow over fresh powder — you get four times more water per volume.
- Bring to a rolling boil for 1 minute (3 minutes above 6,500 ft) before drinking to kill pathogens from animal fecal contamination.
- Insulate the pot and store extra water in bottles kept close to your body so it doesn't refreeze.
Warning: Never eat snow directly for hydration — it drops your core temperature and burns calories your body cannot afford to lose.

Ice & Cold
15 minInsulate under your body, not just over
The ground pulls heat out of you faster than cold air. Two-thirds of your insulation should be underneath.
- Never sleep directly on cold ground, snow, or bare rock — you will lose heat you cannot replace.
- Build a raised bed of dry debris at least a hand-span thick — dry conifer boughs, dead leaves, or grass — and compress it slightly under your weight.
- Add a second layer of finer, softer material on top for comfort.
- If you have a foam pad, keep it as your closest layer to the ground; put a sleeping bag or emergency blanket on top of the pad, not under it.
- Rebuild loft each night — compressed debris insulates far less than fresh, lofted debris.
Tip: Test the bed by lying on it for 5 minutes before dark. If your back feels cold, add another 4 inches of debris before you commit to sleeping.

Signaling
5 minSignal SOS with light, sound, or ground marks
SOS is the most universally recognized distress signal — three short, three long, three short — with any signaling method.
- Light or sound: three short bursts, three long bursts, three short bursts, pause, repeat.
- With a whistle: three quick chirps, three 2-second blasts, three quick chirps.
- With a flashlight or mirror: three short flashes, three long flashes, three short flashes toward the observer.
- On the ground: stamp or scrape 'SOS' in letters at least 10 feet tall in snow, sand, or a clearing.
- Keep repeating in cycles with a pause between; a single SOS is easy to miss.
Tip: The pattern matters more than the medium. A rescuer who hears three-three-three anything will investigate.
Signaling
5 minChoose high-contrast colors for signal panels
Contrast beats color. What matters is that your signal looks nothing like the ground around it.
- In snow or on light rock: use dark materials — a garbage bag, dark jacket, or scorched wood.
- In green forest or grass: use bright orange, yellow, or blaze pink if you have them; a silver space blanket also works.
- On dark ground or wet dirt: light or reflective materials — foil, mirrors, or white cloth.
- Weight the corners and edges with rocks so the panel doesn't blow away.
- Combine ground panels with a geometric shape — a big X or triangle — so aircraft recognize it as human-made.
Tip: Bright red is the color humans notice fastest in natural settings. If you have a red jacket, keep it on top when signaling.

First Aid
20 minManage a sprained ankle in the backcountry
A sprained ankle can strand you if handled wrong. Support early and you can often walk out on it.
- Sit, elevate, and cool the ankle for 15–20 minutes with cold water, snow, or a wet bandana — this reduces swelling that will otherwise lock the joint.
- Assess: if you can bear weight cautiously without a grinding sensation or extreme pain, it's likely a sprain rather than a fracture.
- Support with a figure-8 wrap: run cloth or an elastic bandage under the arch, across the top of the foot, around the back of the ankle, and back across in an X pattern.
- Re-lace the boot firmly enough to stabilize the ankle but not tight enough to cut circulation. Check toes for warm color regularly.
- Walk out slowly using a trekking pole or stout stick on the injured side. Rest and re-cool at every break.
Warning: Numbness, severe deformity, inability to bear any weight, or grinding sounds mean a possible fracture. Splint in place and get help rather than walking on it.

Shelter
15 minAnchor a tarp or tent for a storm
Standard stakes fail in wind and wet ground. Storm anchors keep your shelter down when weather turns.
- Replace stakes with deadman anchors — bury a stick, rock, or stuff sack full of gravel horizontally with the guyline tied around it.
- In snow, dig a T-slot: cut a channel across the guy direction, lay a stake or stuff sack horizontally, and pack snow over it.
- Add secondary guylines from mid-panel tie-outs on every wall — not just corners.
- Angle guylines at 45° from the tarp to the anchor for the strongest pull-through-shear geometry.
- Re-tension every 2–4 hours during a long storm as ground softens and cords stretch when wet.
Tip: Cut short (4-inch) toggles from sticks and larks-head your cord around them — they hold better than tied loops when guys need to be adjusted repeatedly.
Shelter
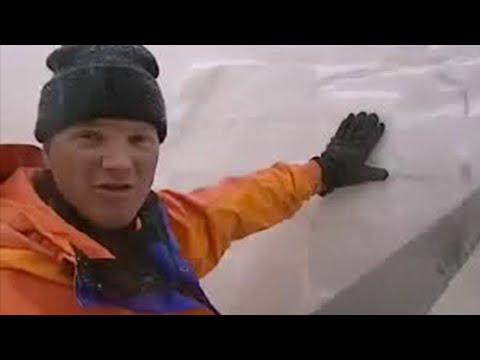
90 minDig a snow cave
A snow cave traps body heat and blocks wind, turning a deadly storm into a survivable night.
- Find deep, stable snow on a lee slope or drift — not avalanche terrain.
- Dig an entrance tunnel lower than the sleeping platform so cold air sinks away from you.
- Hollow out a domed chamber large enough to lie in; keep the roof at least 1 foot thick.
- Poke a vent hole through the roof with a stick to prevent CO₂ buildup.
- Line the floor with pads, packs, or boughs and mark the entrance from outside with a ski or branch.
Warning: Never seal a snow cave airtight. Suffocation from exhaled CO₂ is a real risk without ventilation.
Ray Mears — Building a Snow Cave

Signaling
30 minBuild a night signal fire
At night, flame and light contrast matter more than smoke. A signal fire needs to be seen from the air.
- Choose a high, open spot with a clear view of the sky — ridge, clearing, or shoreline.
- Build three small fires in a triangle 25 meters apart if you have the fuel and it's safe.
- Keep a large supply of dry, fast-burning material ready to throw on when you hear an aircraft.
- Use bright flames against dark terrain; against snow, dark smoke from green boughs contrasts better.
- Only light when you have reason to believe searchers are nearby — a fire left burning is a fire that can escape.
Warning: Never build signal fires in dry, windy conditions where embers can ignite surrounding forest. Clear the ground to mineral soil first.
The Gray Bearded Green Beret — How to Signal for Rescue
Field Skills
10 minBuild a Log Platform for Campfires on Deep Snow
Prevent your campfire from sinking into deep snow by constructing a sturdy, green-wood log platform. This technique ensures a stable burn.
- Select 4-6 fresh, green logs, 4-6 inches in diameter and 4-6 feet long.
- Clear a level, firm area of snow, roughly 4x4 feet, for your fire platform.
- Lay down two parallel logs as your base, spaced about 2-3 feet apart.
- Place the remaining logs perpendicularly across the base logs, close together, forming a solid raft.
- Cut and place smaller, green branches around the edges of your platform to contain coals and ash.
- Cover the log platform with a thin layer of mineral soil or rocks, if available, before lighting your fire.
Tip: Gather more green logs than you think you'll need; they can be used for reinforcement or to extend the life of your platform later.
Warning: Never use deadfall that is punky or rotten, as it will burn through quickly.
Educational reference only. Wilderness conditions change fast — practice in low-stakes settings, take a certified wilderness first-aid course, and confirm regional regulations (fire, fishing, foraging, snaring) before you rely on any of these skills in the field.