


Navigation
Map & Compass: Take Bearings and Set Courses
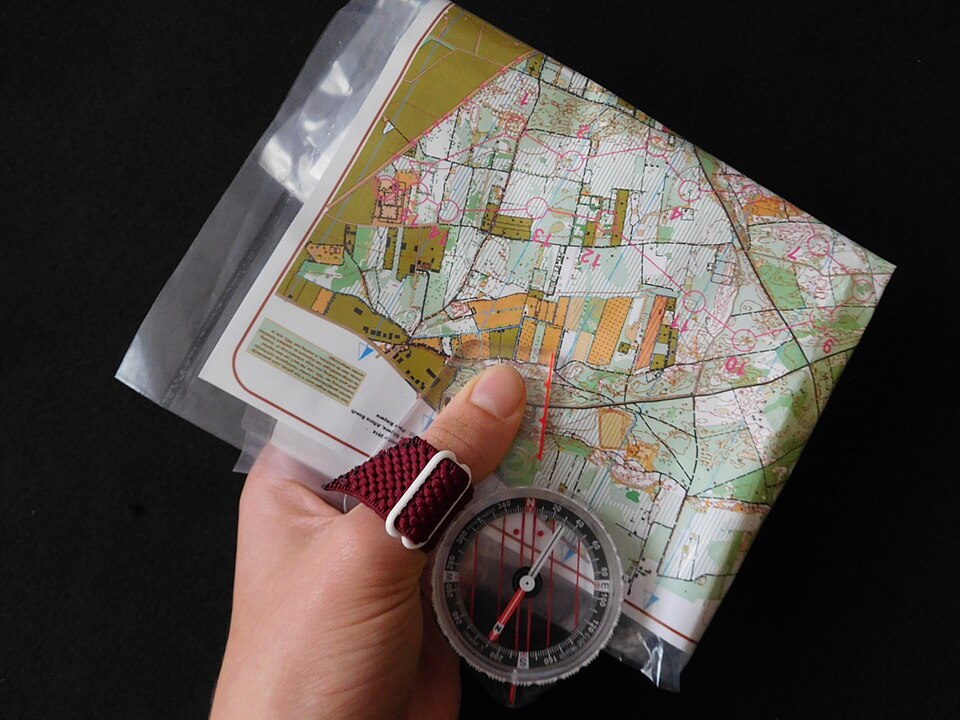
A compass bearing is a direction measured clockwise from north. To set a course, establish your position on a topographic map, choose a safe next checkpoint, measure its bearing, account for the correct north reference, then turn your body until the compass needle aligns with the orienting arrow. Walk toward a visible landmark on that line, checking distance and terrain as well as direction.
Topic summary
A compass bearing is a direction measured clockwise from north. To set a course, establish your position on a topographic map, choose a safe next checkpoint, measure its bearing, account for the correct north reference, then turn your body until the compass needle aligns with the orienting arrow. Walk toward a visible landmark on that line, checking distance and terrain as well as direction.
Key takeaways
- You can distinguish the travel arrow, magnetic needle, orienting arrow and index mark.
- You can explain your north reference and whether declination is already corrected.
- Your repeat readings and terrain checks support the same identifiable checkpoint.
- You stop at an unexpected catching feature rather than continuing past it.
- You can plot a reciprocal bearing and explain why the estimated fix is uncertain.
- Avoid: Reading at the wrong mark or pointing the travel arrow from destination back to start
Intended uses
- Navigation skill (Beginner, ~60 min practice)
- Requires: A liquid-filled baseplate compass with a readable bezel; adjustable declination is helpful, A current, detailed topographic map covering the entire route and escape options, Pencil, ruler or compass map scales, and waterproof map protection, Watch, whistle, headlamp and normal outdoor safety supplies, An offline map/GPS or second navigator as an independent check, not a substitute for practice
Climate suitability
Daylight practice on familiar, low-risk ground; hiking and canoe-trip navigation
Verification notes
Author: Wild10 Editorial. Last updated October 17, 2026.
REI — How to Use a Compass (external instructional video) Watch on YouTube
Required tools
- A liquid-filled baseplate compass with a readable bezel; adjustable declination is helpful
- A current, detailed topographic map covering the entire route and escape options
- Pencil, ruler or compass map scales, and waterproof map protection
- Watch, whistle, headlamp and normal outdoor safety supplies
- An offline map/GPS or second navigator as an independent check, not a substitute for practice
Required materials
- Paper route card or field notebook
- A measured, safe practice area with unmistakable landmarks
Step-by-step
Identify the compass parts. Find the direction-of-travel arrow on the baseplate, the rotating degree bezel, the index mark where you read a bearing, the magnetic needle, and the orienting arrow and parallel lines inside the housing. The needle's north-seeking end is identified by the manufacturer; do not assume every compass uses the same color scheme.
Why: The travel arrow describes your intended movement; the needle only supplies the north reference. Confusing them can send you the wrong way.
Check the instrument on safe ground. Hold it level, let the needle settle, and repeat a reading away from your phone, vehicle, knife, magnetic clasp or other metal. If the reading changes when you move, remove the interference before continuing. Keep the compass suitable for the magnetic zone in which you are traveling.
Why: An accurate-looking number is useless if the needle is tilted, stuck or magnetically deflected.
Confirm your map and north reference. Read its scale, contour interval, date and legend. Locate true north along the map's meridians and distinguish it from the printed grid north. Find a reliable starting point using multiple matching features, not a single vaguely similar bend or summit.
Why: Navigation must start from a defensible position, and true, magnetic and grid north are not interchangeable.
Check current local declination for your location and trip date. With an adjustable compass, set the signed correction using its manual and use a true-north workflow throughout. With an unadjusted compass, keep magnetic and true bearings separate and label both. Never apply a second correction to an already adjusted compass.
Why: Declination varies with place and time, and correction depends on the direction of conversion.
Orient the map. With an adjusted compass, place its travel arrow toward the top of the map and its north-south orienting lines parallel to a true-north meridian; rotate the map and compass together until the north-seeking needle aligns with the corrected orienting arrow. If your compass is unadjusted, use the map's current magnetic-north relationship following the instrument instructions instead. Check that visible terrain now lies in the expected directions.
Why: An oriented map makes it easier to compare mapped slopes, ridges and water with what you can see.
Select one safe leg. Mark start A and checkpoint B. Inspect contours, water, access and obstacles between them. Choose a recognizable attack point near a small target, a useful handrail alongside the route and a safe catching feature beyond it. A straight line across the map may need several safe travel legs.
Why: Checkpoints and terrain boundaries make mistakes detectable before a small directional error becomes a large position error.
Measure A to B. Place a straight baseplate edge along the line with the travel arrow pointing from A toward B. Hold the baseplate still and rotate the bezel until its orienting lines parallel the map's true-north lines and the orienting arrow points north, not south. Read the bearing at the index mark. Use meridians rather than grid lines unless you have explicitly accounted for grid convergence.
Why: Pointing the travel arrow backward or aligning the orienting arrow south creates an approximately 180-degree mistake.
Transfer the map bearing to the field. An adjusted compass retains the true bearing just measured. On an unadjusted compass convert that true bearing to magnetic and set the bezel to the magnetic value. Hold the travel arrow directly away from you and turn your entire body until the north-seeking needle aligns with the orienting arrow. Do not turn the bezel to chase the needle.
Why: The bezel stores the course while rotating your body aligns that course with the real world.
Choose a visible intermediate target along the travel arrow. A distinct tree, rock or terrain feature lets you look up while moving. Walk safely to it, then stop, recheck the compass and choose the next landmark. Do not walk while staring down at the needle, and do not walk backward toward the south end of the needle.
Why: Short visual legs reduce drift and keep your attention on footing and hazards.
Track progress and stop at the checkpoint. Measure the map distance, use your own calibrated pace count and elapsed time as rough checks, and compare terrain along the leg. At B, confirm more than one feature, record your position and set the next leg. If your catching feature arrives first or the terrain conflicts with the map, stop and reassess before continuing.
Why: A compass cannot tell you how far you have traveled or whether a familiar-looking feature is the correct one.
Tip: Write every course as bearing + north reference + distance + checkpoint. Keep the bezel unchanged while following that leg.
Bearings illustrated
Wild10 teaching drawings based on the cited REI and USGS methods. Not navigable maps.
Readings, bearings and compass parts
Bearings run clockwise from north: north is 000° or 360°, east 090°, south 180° and west 270°. Northeast is 045°. Use three digits in a route notebook so 015° is not confused with 150°. A bearing always needs a reference: 075° true and 075° magnetic describe different ground directions wherever declination is nonzero.
A standard baseplate compass has a transparent ruler plate, a travel arrow and a rotating housing. The fixed index line is the point at which you read the number on the bezel. Inside the housing, the needle swings freely while the orienting arrow and its parallel lines move with the bezel. Rotating the housing does not move north; it stores the direction you want to follow. A sighting mirror can help align a distant target and needle simultaneously, but use the technique in your compass manual.
For a field bearing to a visible landmark, face the landmark, hold the compass level with the travel arrow aimed at it, and rotate the bezel until the north-seeking end of the needle sits inside the orienting arrow. Read the index mark, name the landmark and record the north reference. Repeat from the same position before using the number. If you set declination beforehand, the reading is corrected according to that instrument's setup; otherwise it is magnetic.
Declination without the add-or-subtract trap
True north is the geographic north-pole direction. Magnetic north is the local direction indicated by a compass needle. Grid north follows the vertical lines of a projected map grid. The angle between true and magnetic north is magnetic declination; the angle between true and grid north is grid convergence. A UTM grid is useful for coordinates, but it is not automatically a true-north reference.
Check NOAA's calculator using your actual location and trip date, or a current authoritative local source. The declination diagram printed on an old map describes its stated date, not necessarily today's field value. Set an adjustable compass according to its manual. This guide's map examples use true north; a grid-bearing workflow requires its own grid-to-magnetic correction and is not covered by simply copying a true-north value.
For an UNADJUSTED compass, write east declination as positive and west as negative. True bearing = magnetic bearing + signed declination. Magnetic bearing = true bearing − signed declination. Wrap the result into 000°–359°. Fictional arithmetic example: with 10° east declination, a 100° true map bearing becomes 090° magnetic. A 090° magnetic field reading converts back to 100° true. With 10° west declination, 100° true becomes 110° magnetic. These are teaching values, not directions for any real destination.
Do not mix workflows midway through a trip. A correctly adjusted compass is intended to perform the correction for you; adding the correction again produces a new error. Before leaving safe ground, compare a bearing to an unmistakable mapped feature. If the map and field disagree, recheck your starting point, map reference, sign, adjustment and interference rather than inventing an offset.
Build a route card, not just a straight line
Start with a destination you can identify, then work backward to a reliable approach. A small campsite symbol or subtle path junction is harder to hit than a long shoreline or major trail junction. An attack point is an unmistakable nearby feature from which the final short leg begins. A handrail is a linear feature you can follow or keep beside you. A catching feature is a recognizable boundary beyond the target that tells you to stop if you overshoot. None of these makes an unsafe riverbank, cliff edge or restricted road acceptable to travel.
For each leg record start, checkpoint, north reference, bearing, map distance, expected features, catching feature and an escape option. Use the map scale: at 1:25,000, 1 cm represents 250 m on the ground, so a 2 cm line represents 500 m of horizontal map distance. Slopes and detours can make the actual walking distance longer. Measure curved routes in small segments; do not assume a straight-line distance is the trail distance.
Example route-card entry for a fictional practice area: A to B; 100° true; 090° magnetic if using an unadjusted compass with 10° east declination; 500 m map distance; recognizable path intersection at B; broad crossing path beyond B as a catching feature. The bearing and distance alone do not establish a real route. Select actual permitted terrain and verify every feature before trying an exercise outdoors.
Aiming off deliberately biases a leg to one known side of a target on a safe linear feature, so you know which way to turn after reaching that feature. Choose the side and amount based on terrain, distance and likely error; there is no universal offset that guarantees success. Do not aim toward hazardous water, cliffs or land without access.
Follow the course and handle obstacles
After setting the bezel, turn your body—not the housing—to line up the needle. Select a landmark directly along the travel arrow. Lower the compass, walk to the landmark and reset your alignment there. If the landmark disappears behind brush, stop before you lose the line. Repeated short legs are more manageable than trying to hold a distant target through changing terrain.
Calibrate pace count on a measured course, counting each time the same foot lands. Repeat with your pack and on representative ground. There is no universal pace count: slope, snow, fatigue and vegetation change it. Record counts and use them as estimates with mapped features, not as proof that you arrived. On canoe trips, walking pace count does not apply; use shoreline landmarks, mapped distance and an independent position check.
For a small obstacle on safe ground, keep the original course and identify a landmark beyond it before detouring. Rejoin at that landmark and verify your position. A rectangular offset is an optional practice technique: turn 90° to one side, measure a lateral distance, travel parallel to the original course far enough to clear the obstacle, then turn 90° back and travel the same lateral distance before resuming the original bearing. Count only the forward portion as progress along the leg. Unequal paces and sloping ground make this imperfect; remap large detours instead of trusting the shape.
Wind, current and waves can push a canoe away from the direction its bow points. A compass heading is not necessarily the track made good across water. Never use a bearing as justification for an exposed crossing, paddling in fog without adequate skills or equipment, or ignoring local hazards. Keep within your group's capabilities and use secure, identifiable checkpoints.
Back bearings and locating yourself
A reciprocal or back bearing is the opposite direction: add 180° if the original is below 180°, otherwise subtract 180°. For example, the reverse of 065° is 245°; the reverse of 280° is 100°. Keep the same north reference. A back bearing reverses a direction, not your recorded detours; it does not guarantee you will find the start if you have drifted.
To plot your position, identify a distinct mapped landmark with confidence and take a field bearing to it. Convert the reading to the map's true-north reference if using an unadjusted compass. From that landmark, plot the reciprocal bearing back toward you. Your possible location lies along that line. If you already know you are on a particular mapped trail, its intersection with the line may narrow your position, but only if both the landmark and trail identification are correct.
Take bearings to two or preferably three well-separated, positively identified landmarks and plot their reciprocal lines. Lines that cross at useful angles give a more informative fix than nearly parallel lines. Small inconsistencies often form a triangle of uncertainty; large disagreement can mean a wrong landmark, swapped reference or poor reading. Do not treat the center as exact. Compare contours, elevation, shoreline or trail shape and an independent GPS position where available. If the uncertainty could place you near a hazard, do not continue toward it.
When the map and ground disagree
Stop, stay together and note your last confidently known position. Check the route card, compass settings, time, measured distance and the features you actually passed. Move away from magnetic interference and repeat bearings. Reorient the map and ask another person to perform the checks independently; agreement obtained by copying the same mistaken assumption is not confirmation.
Retrace only if the route is safe and you can reliably identify it. Do not turn an uncertain guess into a longer search by trying random bearings. If you cannot establish a safe position, remain in a safe, visible location, manage warmth and water, and use your agreed emergency plan or contact rescue as appropriate. A practiced turn-around decision is a navigation skill, not a failure.
Quick answers before you go
Can I use a phone compass? It can be an additional check, but calibration, magnetic accessories and battery loss affect reliability. Learn your physical compass and carry offline mapping rather than relying on reception. Can I use the edge of the paper as north? Only if the map tells you that edge follows the north reference you intend; trimmed, rotated and printed maps need special care.
Does the red needle always point to my destination? No. The north-seeking needle points toward magnetic north; you align it with the orienting arrow to make the travel arrow point along the set course. Does a 180° return bearing undo every mistake? No. It supplies the opposite direction but cannot recover unknown drift, unrecorded detours or an incorrect starting point.
How much practice is enough? Begin with the supervised drill below, then repeat in different familiar terrain with independent checks. A single hour introduces the workflow; it does not certify wilderness competence. Take a local navigation course before attempting remote off-trail travel, poor-visibility crossings or other consequential navigation.
Common mistakes
- Reading at the wrong mark or pointing the travel arrow from destination back to start
- Aligning the needle's south end with the north orienting arrow
- Applying declination twice, using an old value or confusing grid north with true north
- Changing the bezel while walking instead of turning the body
- Trusting a familiar-looking feature without confirming your position
- Following a line into dangerous terrain or mistaking heading for track across water
Troubleshooting
- Unsteady or contradictory reading: stop, level the compass, remove interference and repeat away from metal.
- Course appears reversed: check travel-arrow direction and both north-pointing alignments.
- Consistent map-to-field offset: recheck north reference, declination sign and whether the compass was already adjusted.
- Expected checkpoint missing: stop at your catching feature, compare measured distance and last known position; do not keep guessing.
- Bearing lines fail to agree: verify landmark identities, conversions and sighting technique; treat the position as uncertain.
Field practice drill
Allow about 60 minutes in a familiar, permitted open area with a partner and a verified map. Spend 10 minutes identifying parts and checking declination; 10 taking repeat bearings to three visible landmarks; 15 plotting and walking two short, hazard-free legs to known checkpoints; 10 measuring your pace count on a known distance; 10 plotting reciprocal bearings and checking your position; and 5 explaining errors and your stop/escape plan. Use an independent check throughout. Do not deliberately become lost or attempt this first in fog, darkness or remote terrain.
Indicators of success
- You can distinguish the travel arrow, magnetic needle, orienting arrow and index mark.
- You can explain your north reference and whether declination is already corrected.
- Your repeat readings and terrain checks support the same identifiable checkpoint.
- You stop at an unexpected catching feature rather than continuing past it.
- You can plot a reciprocal bearing and explain why the estimated fix is uncertain.
Related outdoor skills
Related field guide
Sources
- REI: How to Use a CompassCompass parts, bearings, map orientation and video instruction.
- USGS: Using a compass with a topographic map
- USGS: Map-to-field course setting, Method 2
- USGS: What the different north arrows mean
- NOAA/NCEI: Current declination calculatorUse the actual trip location and date; teaching examples above are not local values.
- Suunto: Understanding declination correction
Educational reference only. Wilderness conditions change fast — practice in low-stakes settings, take a certified wilderness first-aid course, and confirm regional regulations before you rely on any of these skills in the field.